4.1.2 How to install any CMS on hosting, using Wordpress as an example
 A CMS or Content Management System is specialized software designed to facilitate the management of information on websites. Instead of getting into the complex code and details of web development, regular people can use a CMS to create, edit, and manage the content of their online projects.
There are many popular CMS, each with its own features. For example, WordPress is known for its ease of use and large developer community. Joomla and Drupal provide more advanced features.
Please note: to install the site, you need to order hosting and domain name. Also, the site can be installed without a registered domain name, in which case only you will see it on the Internet. This can be done in the following way.
Preparation for installation
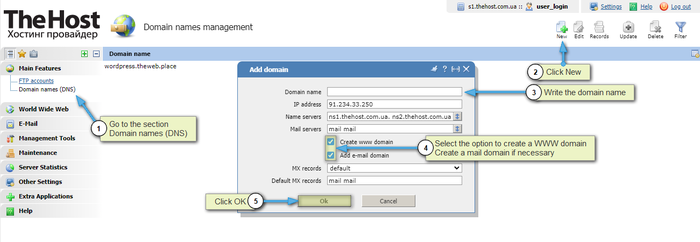
1. Add the domain in your hosting control panel.
- If you specified a domain name when ordering hosting services, it will be automatically parked in your hosting control panel.
- If you are adding a new site, go to the Main - Domain Names section in the ISP control panel and add your domain by ticking all the appropriate boxes during creation. You can read more about adding a domain in a separate instruction.
2. Download and upload the WordPress files to your hosting
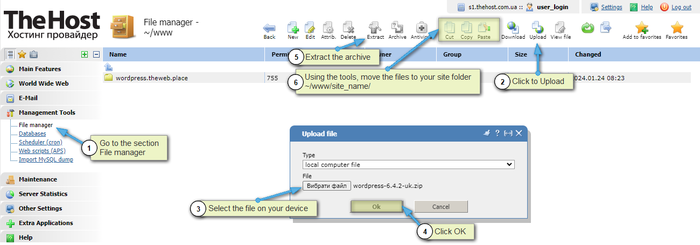
- Download the latest version of WordPress;
- Download the archive to the root folder of your site on the hosting and unpack it. You can use your control panel’s file manager or an FTP client such as FileZilla.
3. Create a Mysql database and a user
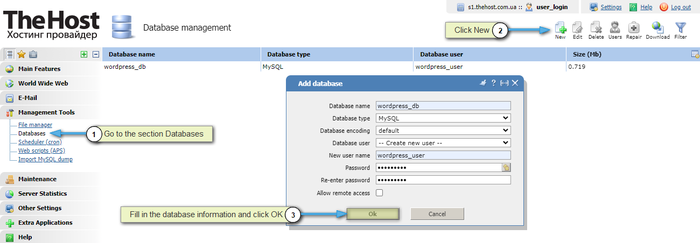
- In the Databases section, you need to create a new database. Please note that the name of the Database and its users may contain letters of the English alphabet, numbers from 0 to 9, underscore “_” and hyphen “-”. Letters of non-Latin alphabets, special. characters and spaces are not supported. Save the parameters of your database (name, login, password), they will be needed for the installation of the site and its further operation.
Installation of CMS on the example of Wordpress
1. Enter the address of your site in the web browser. A welcome window will open, read it and click Let’s go!. In case of errors, we advise you to read the possible errors when installing CMS section at the end of this article.
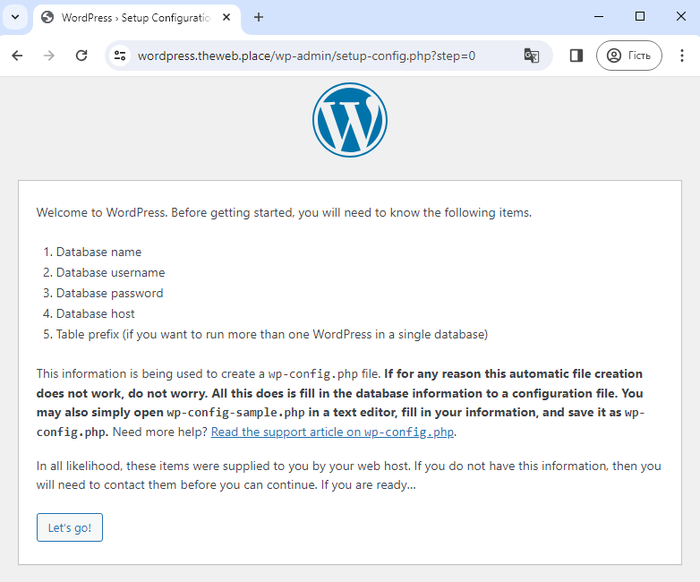
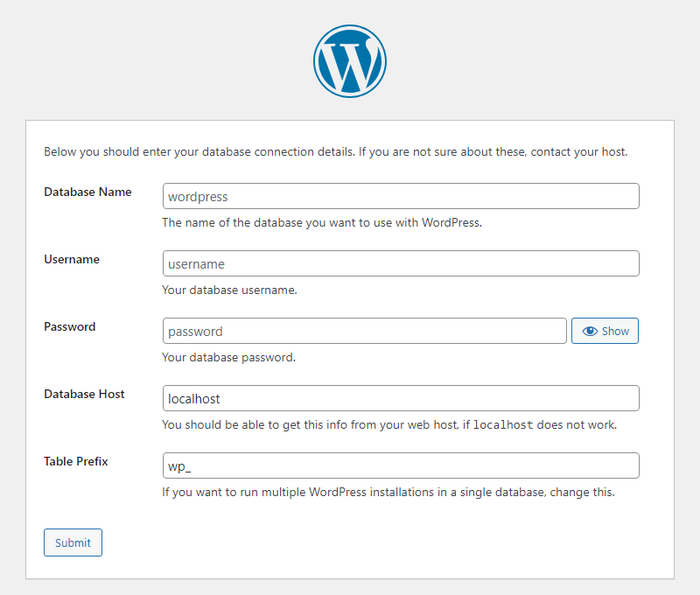
2. Fill in the information about the created database. The creation procedure was demonstrated in the previous section Preparation for installation. You can also read the separate instructions for creating a database.
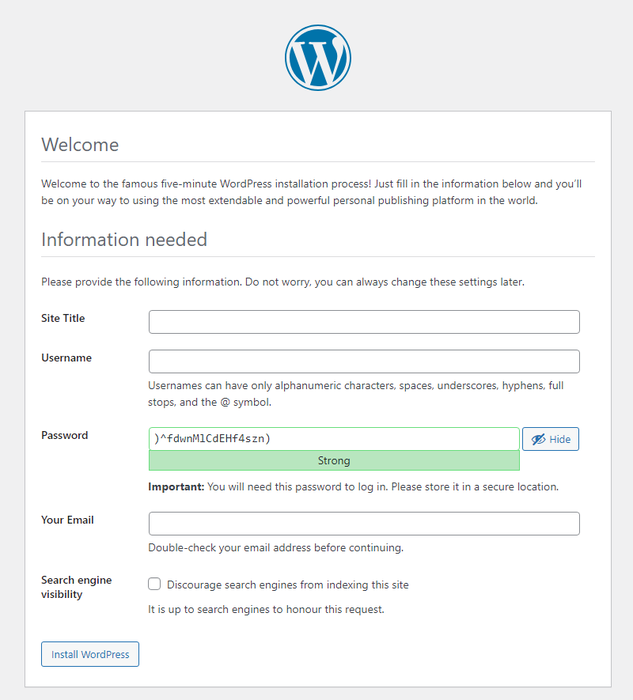
3. Fill in the required fields for the site name, admin panel login and email address. It is important to use a valid email address, it will be used in case of password recovery. Optionally set Visibility for search engines if you need to hide the site from search engines during development.
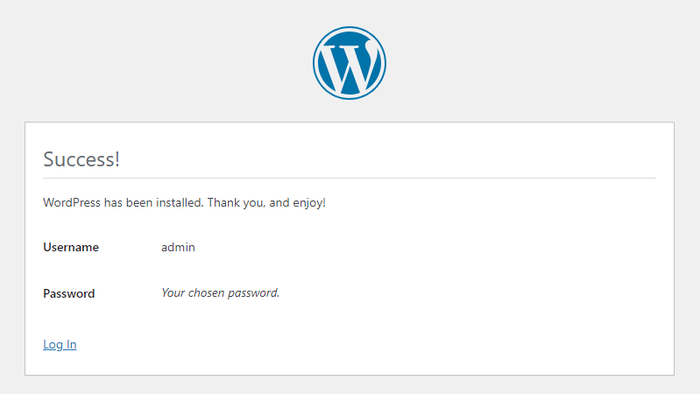
4. You have successfully installed the CMS. Next, you will be prompted to log in to the admin panel – for authorization, use the login and password you set in the previous step. It is important to save these data, because they are known only to you.
Important: possible errors when installing CMS
1. The site opens with an error ERR_NAME_NOT_RESOLVED:
- If the domain was registered recently, you need to wait 6-12 hours for DNS update;
- There may be an error in writing the domain or the domain is not yet registered. If the domain is not registered, it must be registered separately.
2. When opening the site, instead of installing the CMS, it is displayed that the site has been created:
- you need to delete the stub file, more.
3. The site opens with an error 40x, 50x:
- check that there are installation files in the site directory, the site directory usually has the path
~/www/site_name/; - check the installed version of PHP.
4. Does not accept parameters to the database:
- check that the database server is assigned localhost ;
- check whether the access parameters are valid, for example by connecting to the database using phpMyAdmin;
- if necessary, you can assign a new password to the database.
5. When opening the site, a security error is displayed or the site’s SSL certificate is not trustworthy:
- you need to connect a commercial/free certificate.
6. Error ERR_TOO_MANY_REDIRECTS:
- you need to activate a forced redirect to the https protocol .


