6.6.1 Hestia Control Panel. How to Install Hestia Control Panel on a Clean Virtual/Dedicated Server
Note: To install, you need to have an active virtual or dedicated server service with a clean OS from the list supported by the panel.

Hestia is a free server control panel, a fork of the Vesta panel that has surpassed its predecessor in many ways and has become a worthy alternative to many competitors.
Hestia is relatively undemanding and is excellent for hosting and administering websites on your server. Thanks to its simple and compact interface, administrators can quickly deploy and work from a central control panel with user accounts, mail domains, SSL certificates, data backups, CMS installation, web domains, DNS zones, and more.
Hestia supports both Ukrainian and Russian language interfaces.
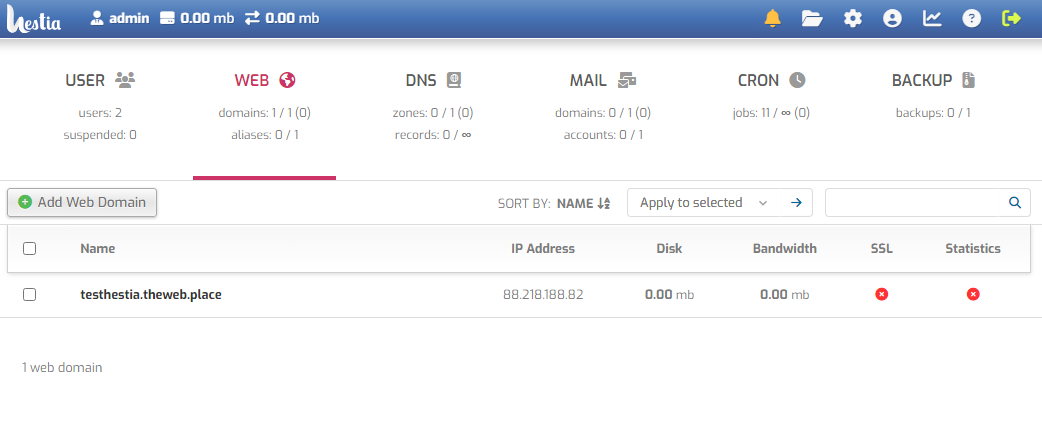
Appearance of the Hestia panel interface:

You can also test the panel’s functionality using the demo version on the developers’ website.
Hestia supports the following operating systems: Debian 10, Debian 11, Debian 12, Ubuntu 20.04 LTS, Ubuntu 22.04 LTS.
Attention: we strongly recommend using only the latest versions of operating systems. Older versions may have security vulnerabilities, not support the latest packages, and their developers support period will surely expire earlier.
You can find more information about the Hestia panel here:
Manual Installation of Hestia on a Clean Server
Hestia control panel should be installed on a clean operating system to ensure proper functionality. We recommend using at least Cloud-2 virtual servers for Hestia.
To begin the installation, connect to the server via SSH as the root user and execute the following commands:
1. Update the server packages:
apt-get update && apt-get upgrade
2. Download the installer to the server:
wget https://raw.githubusercontent.com/hestiacp/hestiacp/release/install/hst-install.sh
3. Run the script to install the standard panel configuration:
bash hst-install.sh
Alternatively, use the scriptline generator to choose the optimal panel configuration.
4. After running the installer, you will be shown a list of installed software. Agree, specify the panel administrator’s email, and hostname (e.g., your site’s domain or subdomain).

The panel installation will be completed within 10-15 minutes, and the final output will include access parameters to the server. By default, port 8083 is used to access the panel. To open the control panel in your browser, enter the address https://127.0.0.1:8083/, where 127.0.0.1 is the IP address of your server.
If you encounter any difficulties during the installation, seek assistance from our technical support.


