6.3.5 Data Autoclean
The control panel of your KeepData Cloud storage allows you to create tasks for automatic data deletion. With its help, you can automatically clean up your disk space using an algorithm you have previously configured.
Question: How can such a function be used in practice?
- Server for storing recordings from IP cameras for a certain period, automatically deleting the oldest recordings when approaching the disk space limit.
- Storing backups from remote hosting for a period, which will similarly delete the oldest available backup.
- A repository for accounting reports that deletes no longer relevant documents after a certain period has passed.
- Any other scenarios in which stored files become irrelevant over time.
Setting up a new job
To create a new one and manage existing tasks, go to the Data autoclean tab in your KeepData panel:

Here you can create a new task, view and change existing ones, force a task to execute regardless of its conditions, view the execution log and, of course, delete an existing task.
To create a new task, click on Add new task. A new form will open:
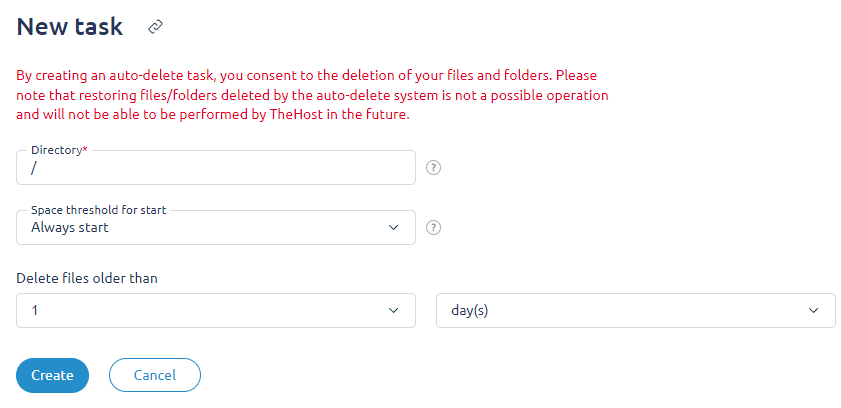
When creating a task, you can configure three variable values:
- Directory. Directory or path for which the job will be applied, for example
/backup
Please note: the task will delete all files in the specified directory, its subdirectories and empty directories further down the tree. If all files in a subdirectory have been deleted, the subdirectory itself will become empty, but will not be deleted until the next time the job is executed.
- Space threshold for start. Defines the occupied space threshold for running the job. For example, with a value of
>70%, your task will not be executed until the server reaches a threshold of 70% of the occupied disk space. - Delete files older than. Allows you to specify how old files the task can delete. For example, when setting
2 months, files older than 2 months will not be deleted as part of the task.
Attention: Be careful when creating a task! By creating a task with the standard values /, Run always and 1 days, you will sentence almost all data on the server to be deleted! It is not possible to recover data deleted as part of auto-delete!
Let’s look at an example of the practical application of this functionality.
Example: storing recordings from IP cameras
- Given: cloud storage of 25 GB; recordings from IP cameras are uploaded daily to the
/cameradirectory. - Task: store as many video recordings as possible on the cloud storage; maintain at least 5 GB of free space for other tasks; keep records for at least 14 days.
- Solution: Directory=
/camera; Threshold=>80%; Period=>14 days:

In this scenario, all files in the /camera directory older than 14 days will be automatically deleted when the server reaches 80% (20 GB out of 25) of occupied space.
Important: if the specified threshold of used space (80%) has already been exceeded, but all files in the specified directory are younger than the specified lifetime (14 days), then the job will not be able to delete any files. Please take this into account if the main purpose of using auto-delete is to free up disk space.
Task execution log
The KeepData panel creates detailed reports on the execution of your auto-delete jobs each time you run them.
To view them, select the desired task and click Log at the top. A list of created logs will open:

Select the log file for the date you are interested in and click View. The opened file contains a log of all actions performed as part of the automatic deletion task:


