3.5.2 How to create a database. How to import a MySQL dump

Database is an organized collection of data that is stored and managed using special software. In simple words, it is a huge table that stores all your data, be it customer lists, products in stock or sales records. Databases allow you to efficiently store, organize, and access information, making them essential tools for any advanced website. Databases are required for most popular CMSs, such as Wordpress or Opencart.
A Database dump is a file that contains a copy of all the data from a specific database. This file can be used to create a backup copy of data or to transfer data from one server to another. The most common dump format is .sql.
How to Сreate a Database in the ISPManager Panel
To create a database, go to the Databases section in the ISPManager4 control panel and click New. Next, specify the name of the database, the database user name and specify its password. Save this data, as you will later need to use it to log into phpMyAdmin or to install the site.
To be able to connect to the database remotely, you need to activate the appropriate option:
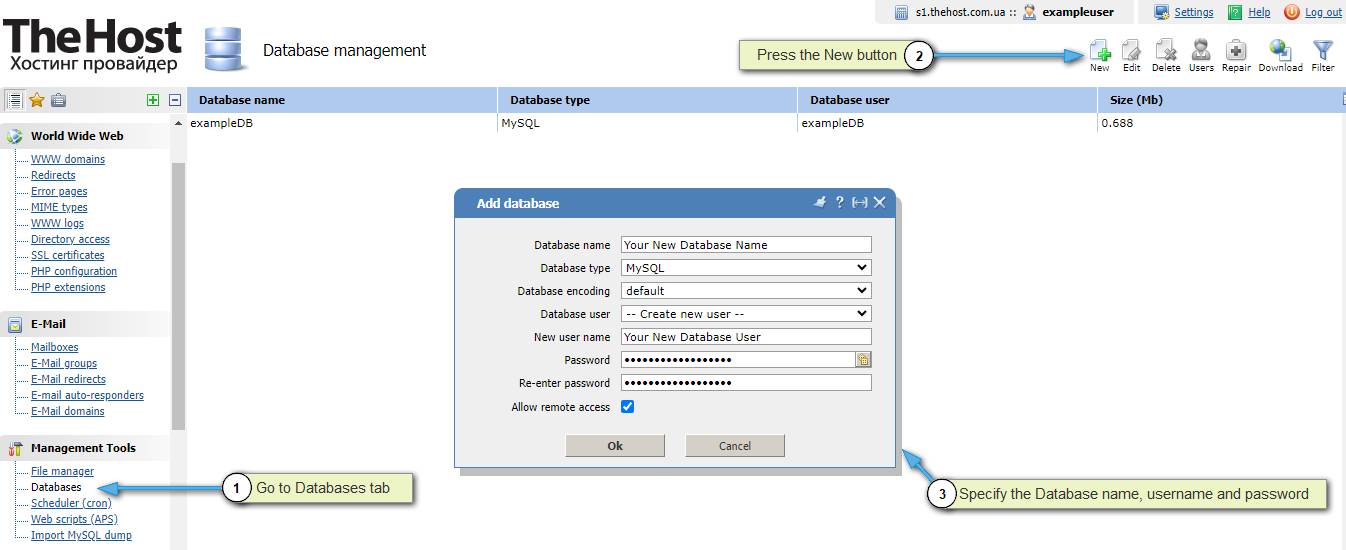
When creating a database you need to specify:
- Database name. Names can only contain letters, numbers, and underscores
_. They cannot start with a number. The Latin alphabet must be used. The database name must be unique and not contain keywords, for exampleSELECT. - Database user. Same with the name of the database. The username and database name may be equal.
- Database user password. Technically it can be anything, but our hosting security system will not allow a weak password to pass through. We recommend using our password generator.
Additionaly: You can also create a database of the PostgreSQL type. You can select the database type in the Database type row during DB creation.
Import Database Using phpMyAdmin
This method is more suitable for small dumps; dumps larger than 100 MB are best imported using the methods described below.
1. Log in to the control panel in the Extra applications - phpMyAdmin section.

2. For authorization, use the database user name and password that you specified when creating the database.
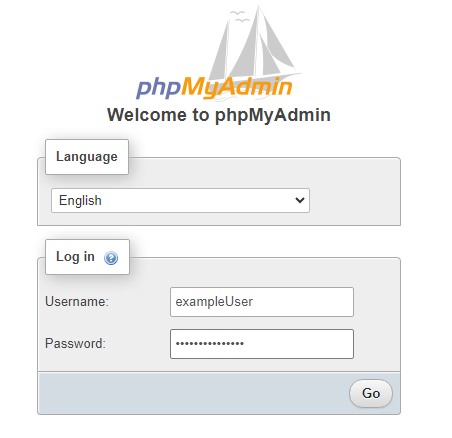
3. In the menu on the left, first click on your database and then in the top menu click Import.

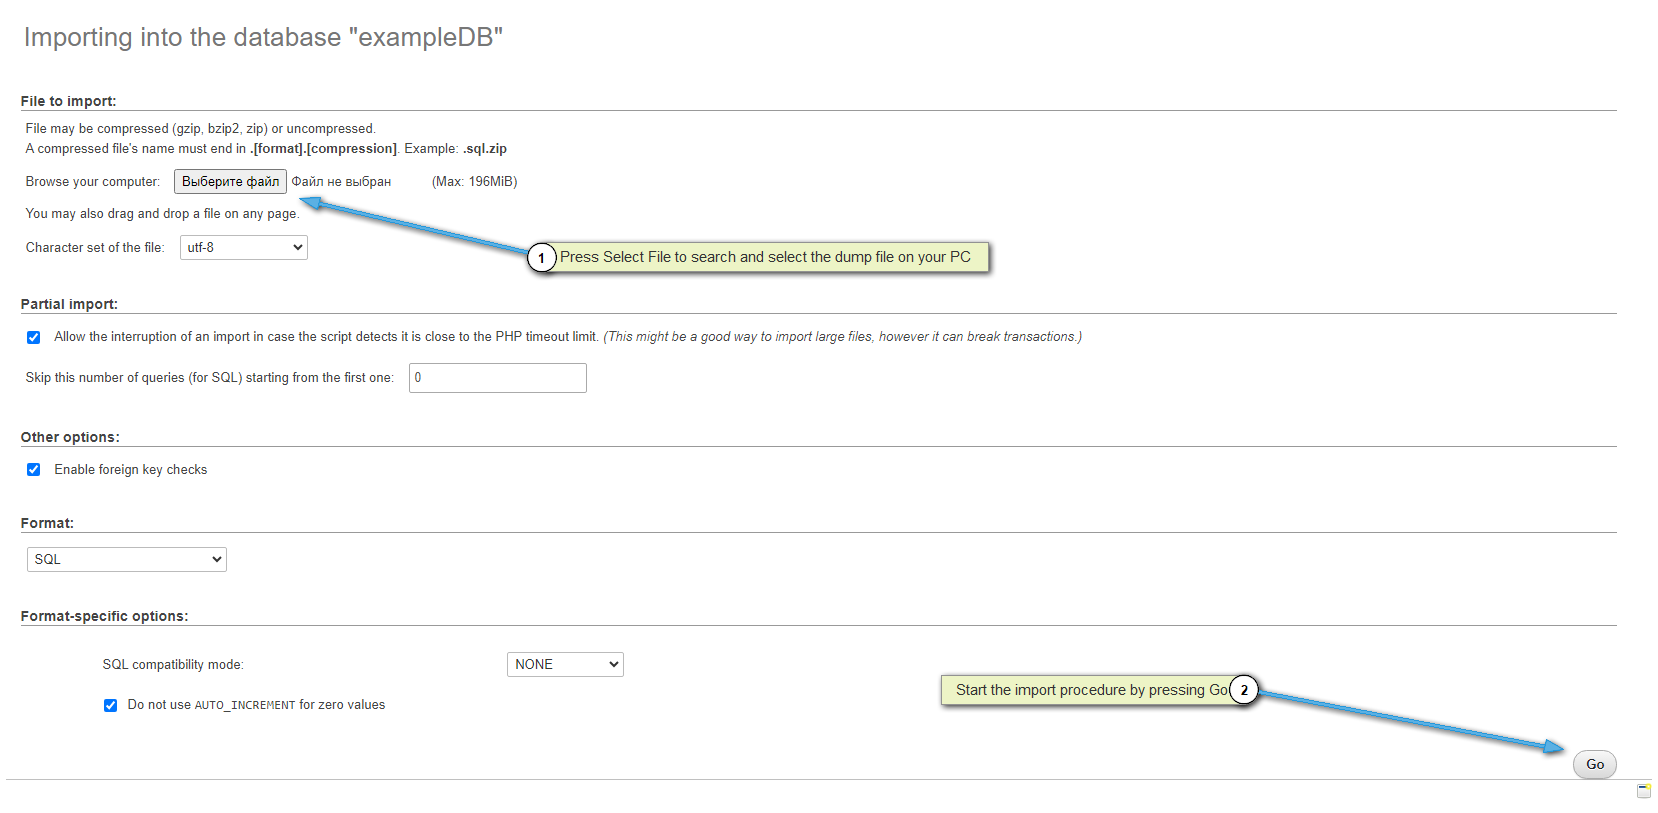
4. Next, click Select file and select the local location of the dump on your PC. Click Go to start importing. In case of any errors during import, phpMyAdmin will indicate an error:
Importing a Database Using the “MySql dump import” Plugin
This method is designed specifically for importing large dumps.
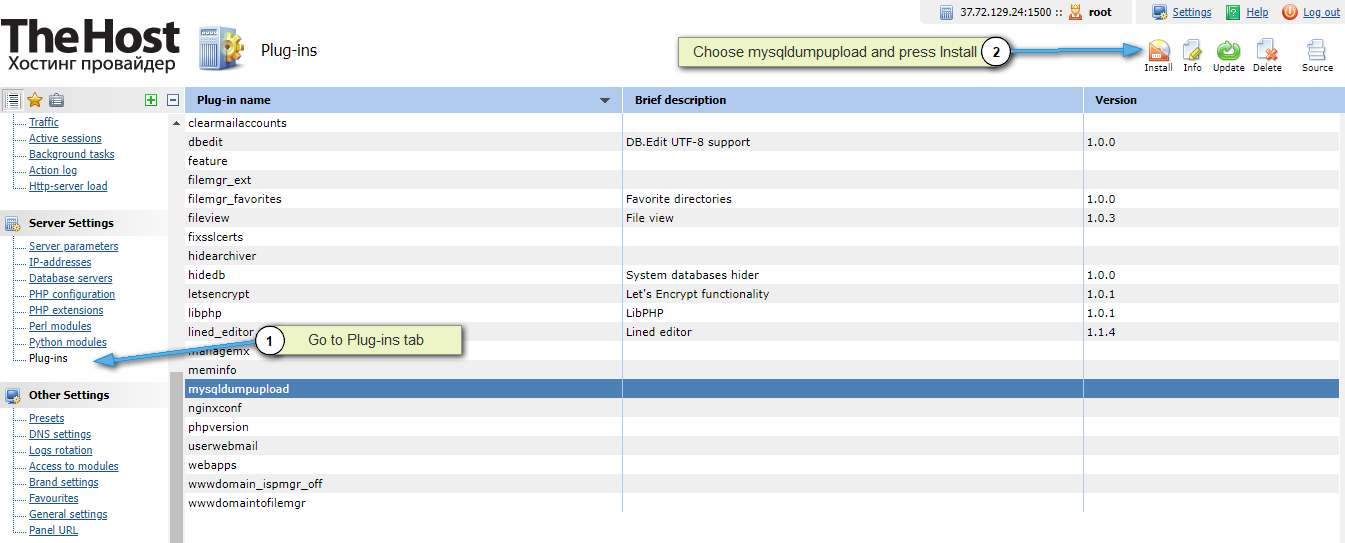
Please note: this plugin is installed on all hosting servers by default. If you are using a virtual/dedicated server service, then this plugin can be installed on your server under root in the Plug-ins section by selecting it from the list and clicking Install:
1. To import, you first need to upload the dump to your server. This can be done via FTP or in the ISP control panel in the File Manager section by clicking on the Upload button:
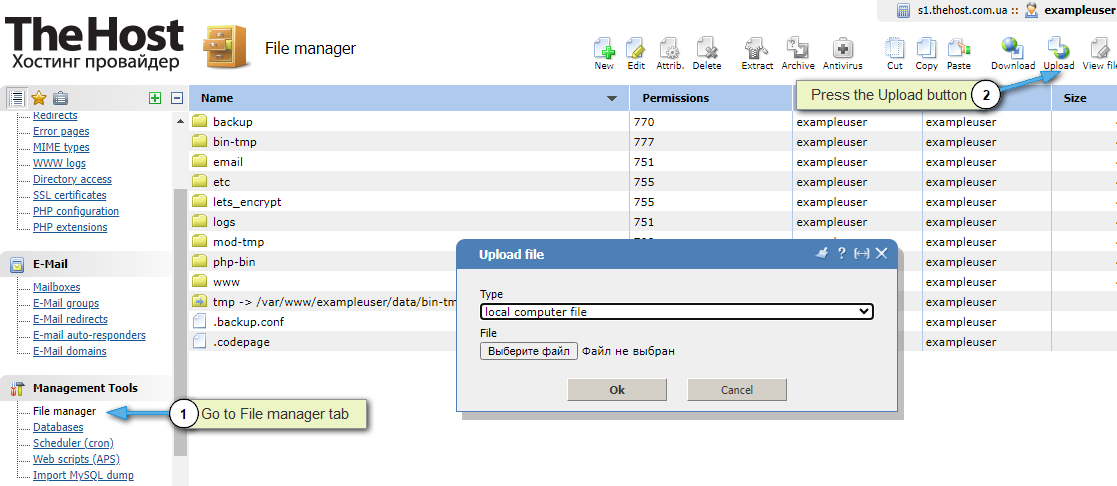
2.. Create a new empty database with a name, user and password similar to those of the old database whose dump you plan to import. This method only imports into an empty database.
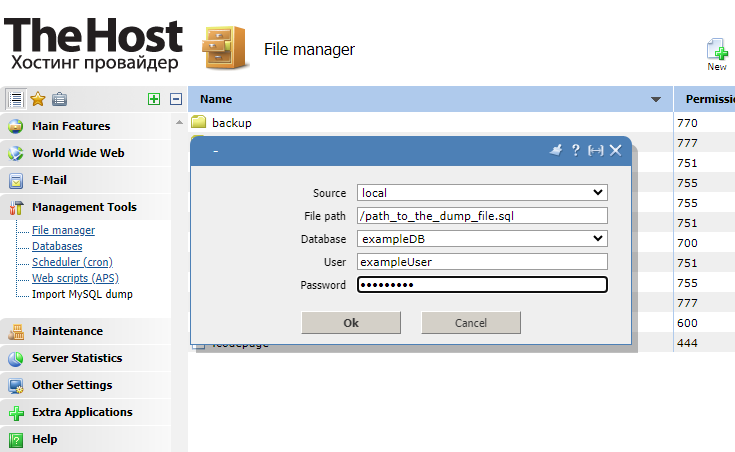
3. Next, in the control panel, select Import MySQL dump. Select the Source: local and specify the local path to your dump on the server. It is most convenient to upload the dump to the root of the server, then the path will be the file name itself. The username and password must be those that were assigned when creating the database.
Important: The dump file must be in .sql format.
4. Import is considered successful if the database size is not zero.
Import Dump Using SSH
1. To import, first upload the dump to the server in any convenient way. The dump must be in .sql format.
2. Next, connect to the server via SSH and run the command:
- mysql -u db_user -p db_name <db_dump_file
After successfully entering the command, you will also be required to enter the password for this database user.
In case of failure, the error due to which the import failed or was interrupted will always be indicated.


