3.2.8 How to issue and configure free Let's Encrypt SSL
TheHost hosting officially supports Let’s Encrypt certificates. Let’s Encrypt certificates are free but functionally equivalent to traditional commercial certificates from certification authorities like Sectigo/Comodo, RapidSSL, Thawte, GeoTrust, and others. Let’s Encrypt certificates have the following features:
- Certificates of this type are domain-validated certificates. Therefore, it is mandatory that the domain name for which the certificate is being generated is active and points to the main A-record of the server on which the certificate is being generated. Let’s Encrypt certificates cannot be issued for domains that are unregistered, inactive, or directed to another server.
- The validity period of SSL Let’s Encrypt certificates is 90 days from the date of issuance.
- Renewing a Let’s Encrypt certificate is only possible 2 months after issuance.
- To renew Let’s Encrypt certificates, you need to generate a new certificate in the hosting control panel.
- Our hosting service offers the option to enable automatic renewal for Let’s Encrypt certificates…
Step-by-Step Guide how to Issue and Connect Let’s Encrypt SSL
Note: the actions described in this guide should be performed in your hosting control panel. Such functionality is not available in your personal account. For more information about what a hosting control panel is and how to access it, you can read here.
In general, issuing a Let’s Encrypt certificate is as simple as logging into your hosting control panel and performing a few easy steps:
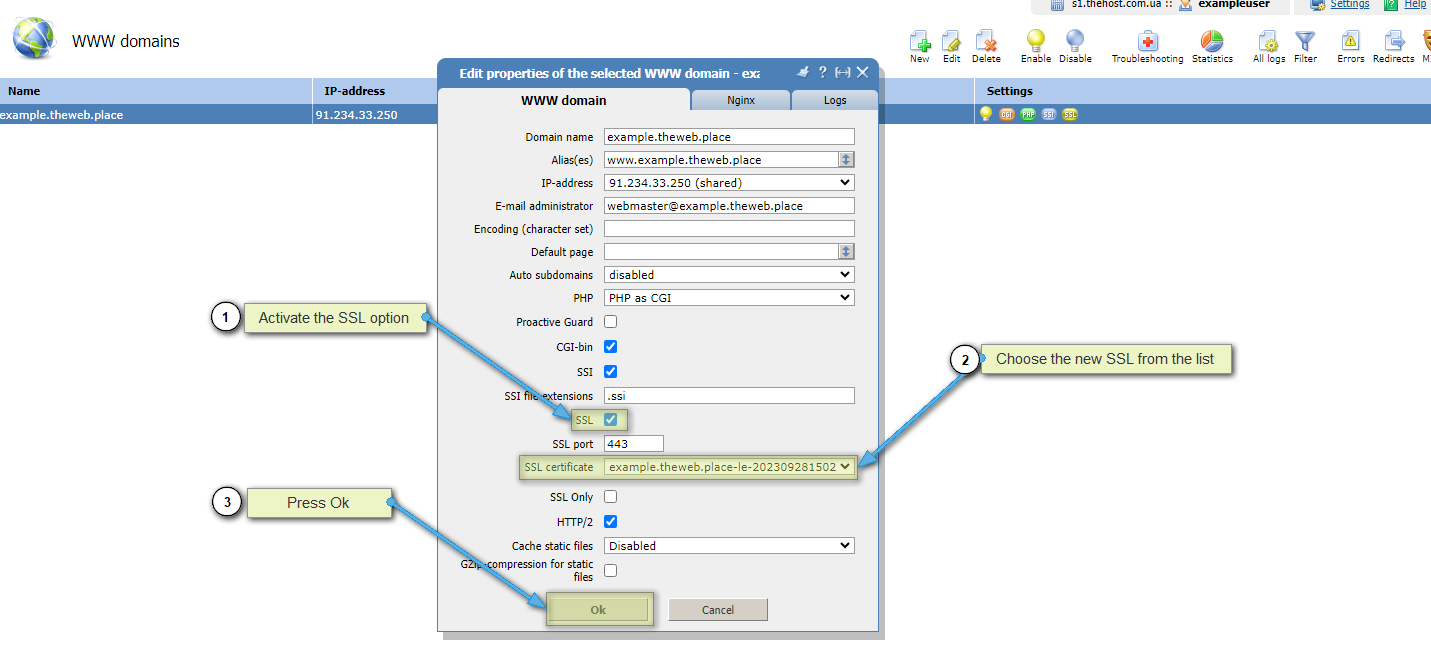
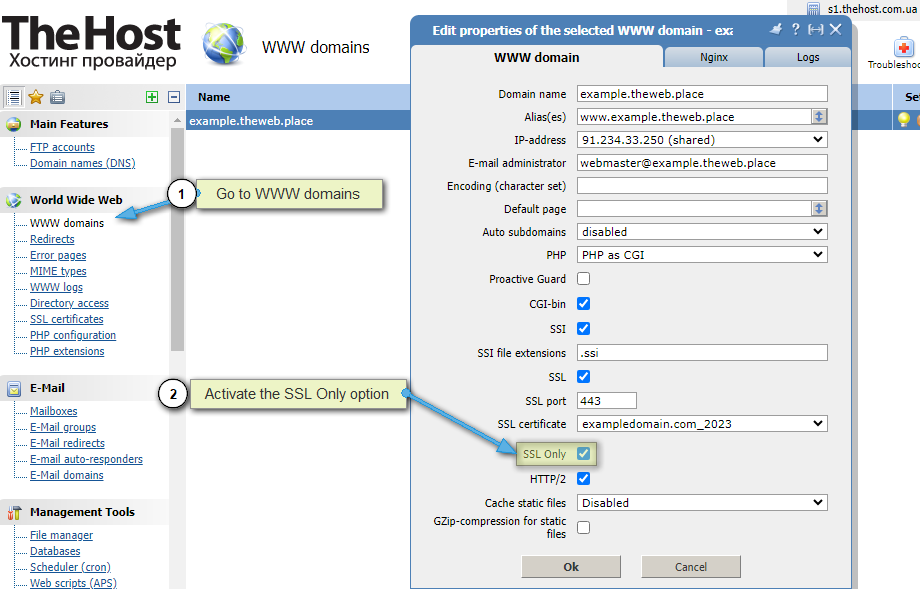
Next, you need to set up the certificate for the website you want. To do this, go to the World Wide Web -> WWW Domains section, open its properties, and enable the new certificate:
Guide: installation of Let’s Encrypt SSL certificate in a step-by-step format
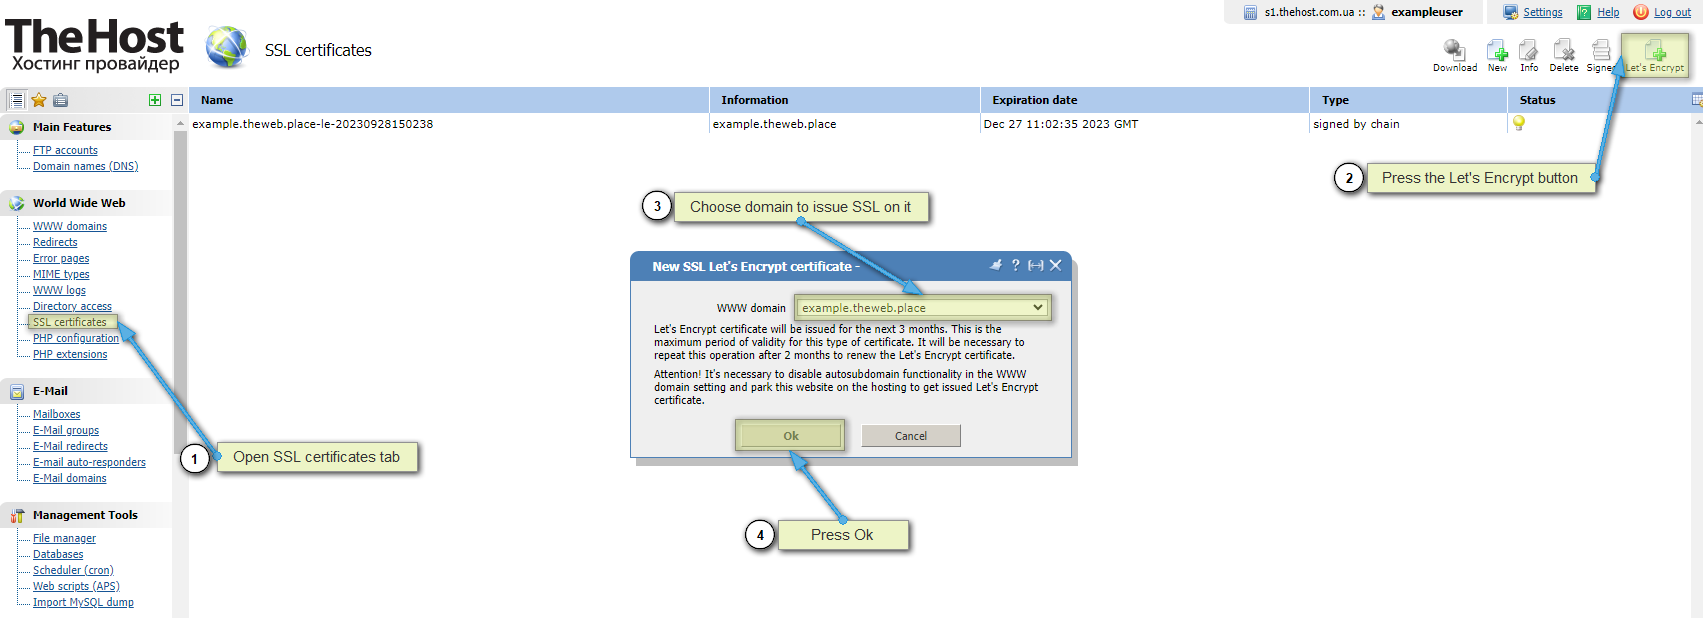
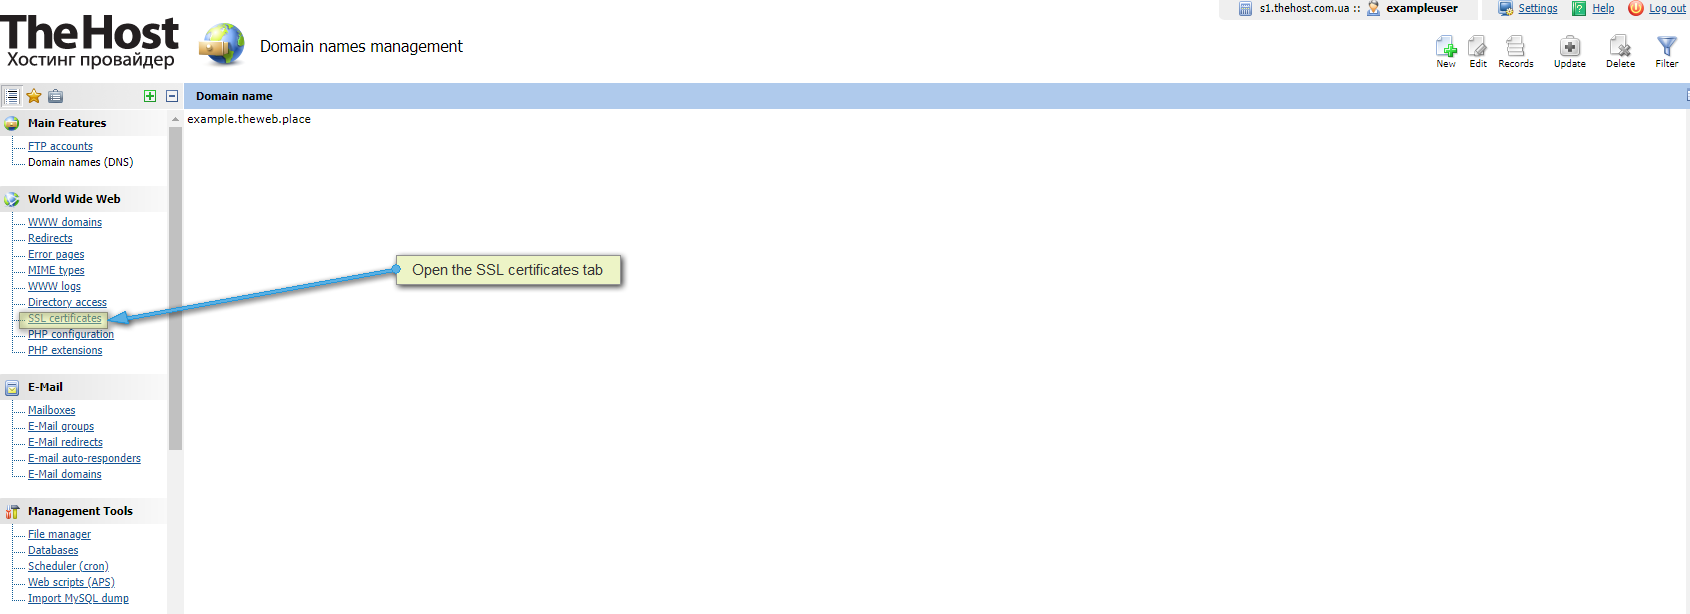
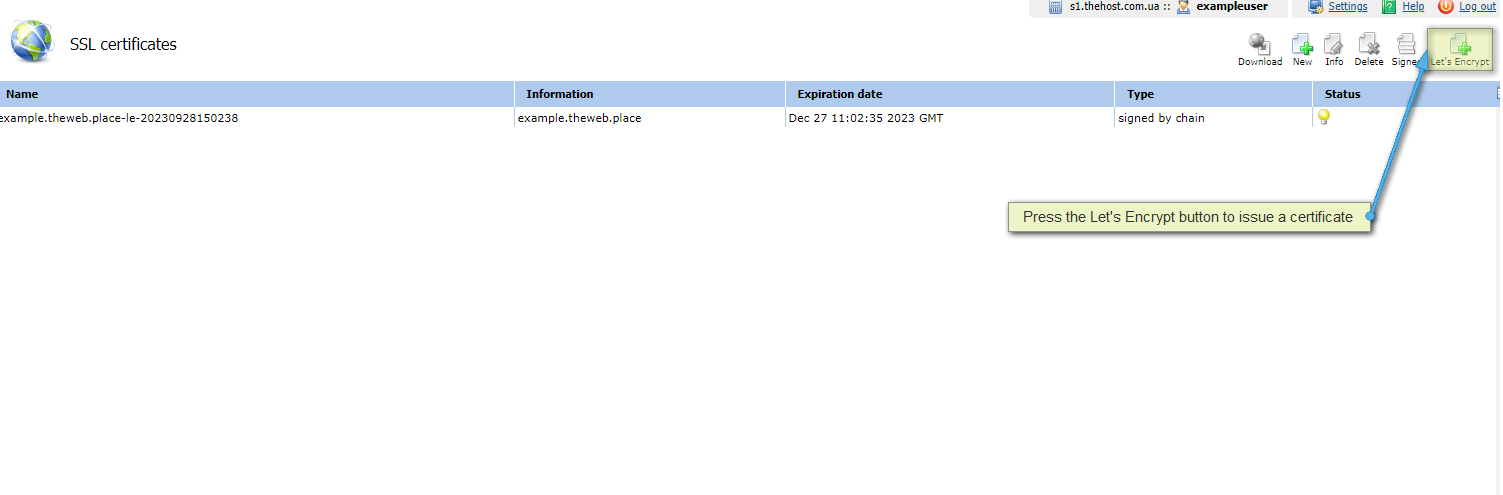
1. In your hosting control panel, open the SSL certificates section:
2. In the top menu, click on the Let’s Encrypt button:
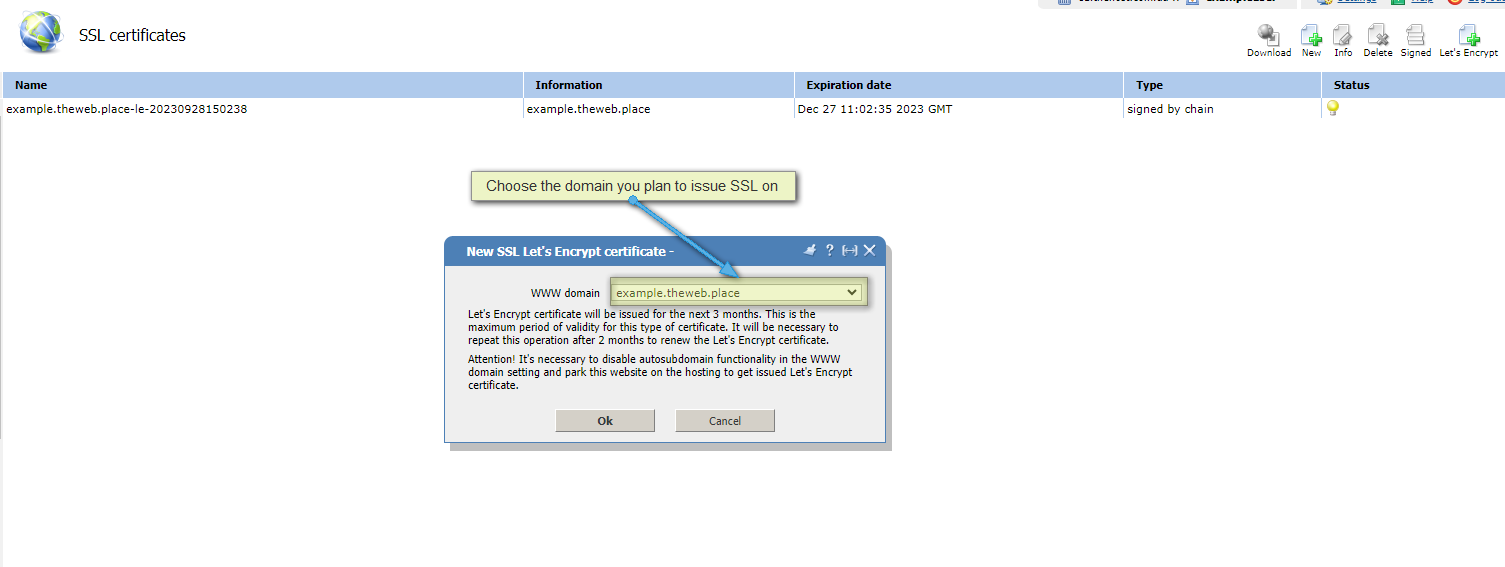
3. In the opened window select the website for which you plant to issue a Let’s Encrypt certificate:
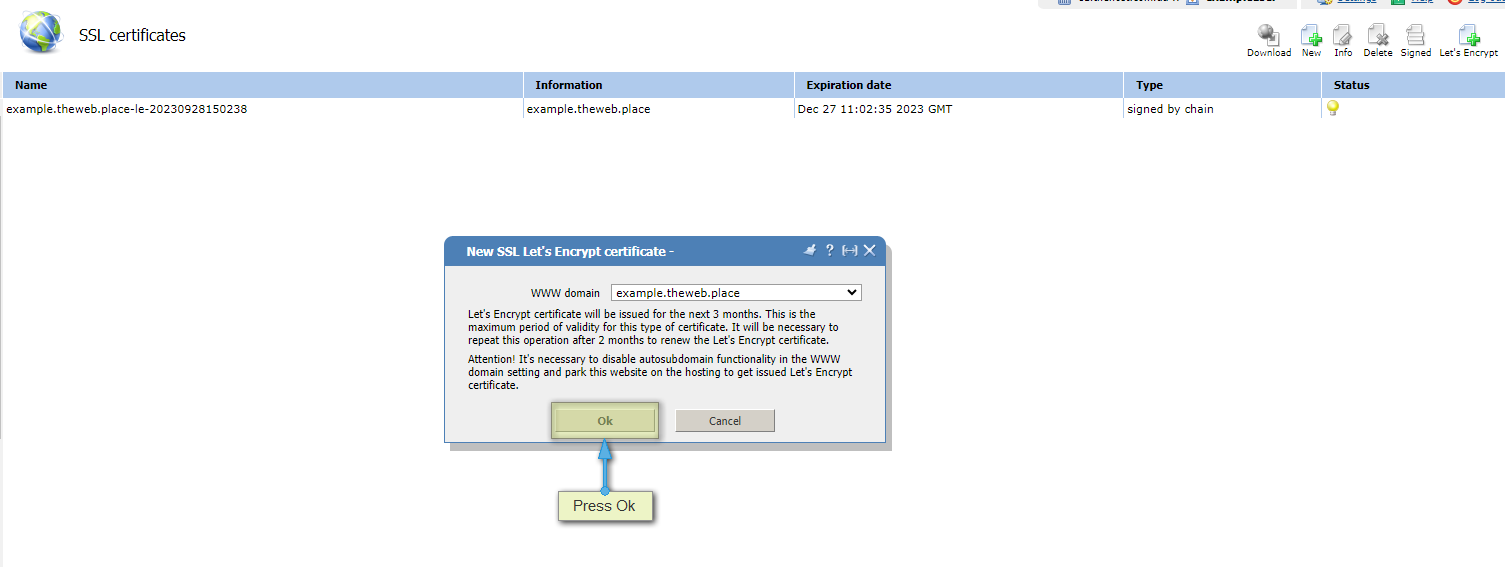
4. To confirm the certificate issuance, click Ok:
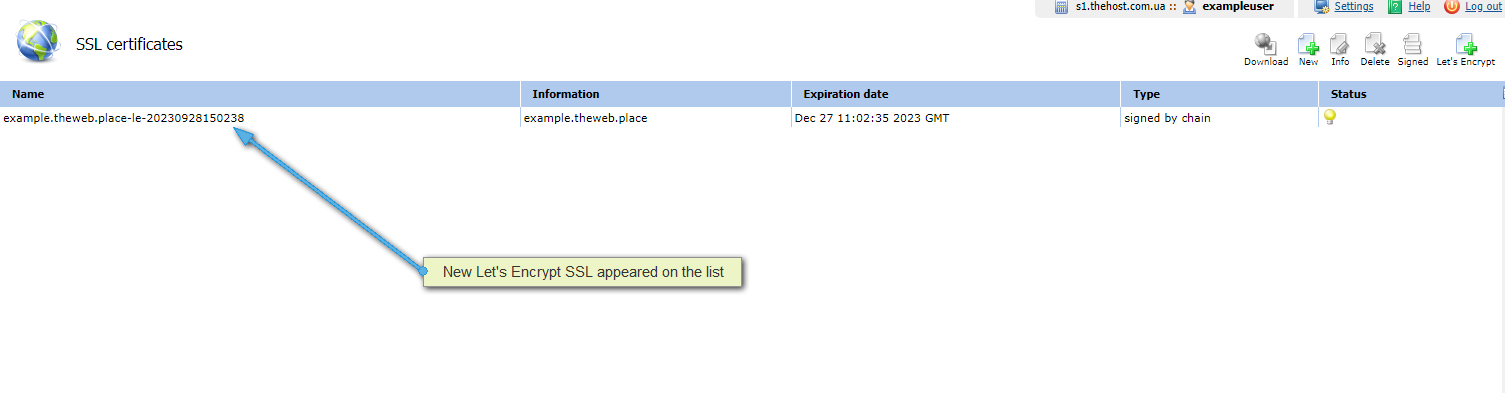
5. Afterward, a new Let’s Encrypt certificate should appear in the list of SSL certificates within 20-30 seconds:
6. Next, you need to set up the certificate for the website you want. To do this, go to the World Wide Web -> WWW Domains section, open its properties, and enable the new certificate:
Enabling Forced Redirect from HTTP to HTTPS
The certificate is installed, connected, and active. How to force redirect all visitors from http:// to https://?
There are two options to enable such a redirect on the web server side.
1. Standard, applicable for all our hosting servers and new OS templates with ISPManager panel:
Additionaly: Enabling forced redirect from http:// to https:// in ISPManager panel.
On all shared hosting servers, you can do this in the ISP control panel. To do this, navigate to the WWW Domains section, select the desired domain, and click Edit. Then, in the properties, check the SSL Only option.
2. Manual, when using virtual and dedicated servers with old OS templates (below Ubuntu_18+ispmgr):
Additionaly: Enabling forced redirect from http:// to https:// using Nginx configuration.
You need to add the following block to the Nginx configuration for the specific WWW domain:
    if ($ssl_protocol = "") {
      rewrite ^ https://$server_name$request_uri? permanent;
    }
Here’s an example of how it should look in the configuration file /etc/nginx/nginx.conf/:
  server {
    server_name example.com www.example.com;
    listen 91.234.32.170;
    listen 91.234.32.170:443 ssl;
    disable_symlinks if_not_owner from=$root_path;
    set $root_path /var/www/exampleuser/data/www/example.com;
  if ($ssl_protocol = "") {
    rewrite ^ https://$server_name$request_uri? permanent;
 }
  location ~* ^.+\.(jpg|jpeg|gif|png|svg|js|css|mp3|ogg|mpe?g|avi|zip|gz|bz2?|rar|swf)$ {
    root $root_path;
    access_log /var/www/nginx-logs/exampleuser isp;
    access_log /var/www/httpd-logs/example.com.access.log ;
    error_page 404 = @fallback;
 }
  location / {
    proxy_pass http://91.234.32.170:81;
    ....
Additionally, you can do this on a VPS under root in the WWW Domains section by selecting the desired site, clicking Config in the upper right corner, and adding the necessary code for the site in the Nginx tab.
Automatic Renewal of Let’s Encrypt Certificates
On our hosting, you also have access to the functionality of automatic renewal of Let’s Encrypt SSL certificates.
In the SSL сertificates tab of the hosting control panel, find a certificate that meets the following requirements:
- It is a Let’s Encrypt certificate.
- The certificate is currently active and connected to a domain.
Afterward, right-click on such a certificate and click the Info button in the upper right corner of the panel’s interface. This will open the certificate’s properties window, where you can find a special option called Auto Renew:
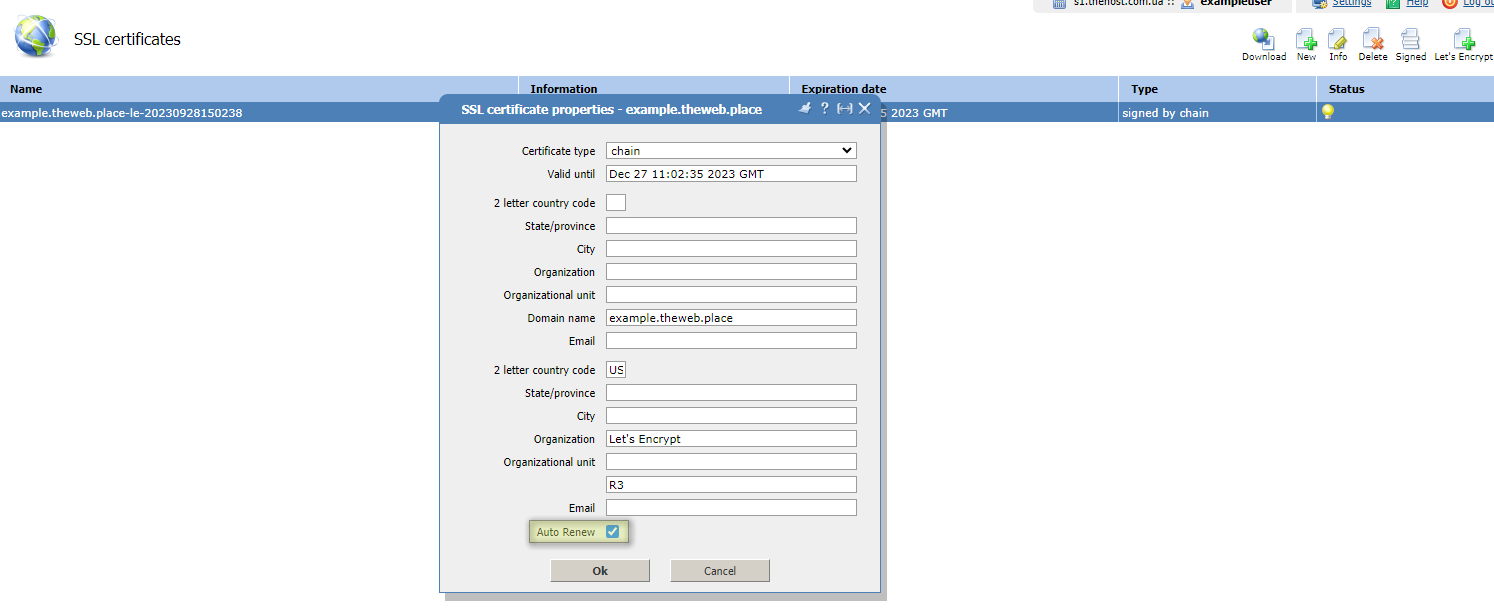
By enabling this option and clicking OK, you activate automatic renewal for this and future SSL Let’s Encrypt certificates for a specific domain.
Info: How does autorenewal work?
Approximately once an hour, the script checks all active certificates marked with this checkbox and automatically renews those whose expiration date is within 30 days (or has already expired).
In the case of successful renewal, the new certificate will replace the old one, and the old one will be saved with the same name and the extension .previous.
Maintenance Features and Possible Errors
When Let’s Encrypt certificates are issued, special directories are automatically created for users in the root folders:
-
A
lets_encryptfolder in the root of the hosting account. This service folder is about 300KB in size and provides the technical capability to issue Let’s Encrypt certificates to the user. It is not advisable to delete it; however, it will be automatically restored when a certificate is reissued or renewed. -
A
.well-known/acme-challengefolder in the root of the site for which the Let’s Encrypt certificate was issued. This directory, up to 10KB in size, is necessary to verify site ownership/affiliation. We do not recommend deleting it, but like the previous directory, the system will automatically restore this folder when a certificate is reissued or renewed.
There are also limitations on the issuance of SSL certificates - this is described in more detail in the technical documentation of the Let’s Encrypt certification authority.
If any errors occur when issuing SSL certificates, you can first manually delete the specified folders:
lets_encryptin the root of your hosting account..well-known/acme-challengein the root directory of your website.
Then, attempt to issue the certificate again following the guide mentioned above.

