6.6.11 Remote backup in DirectAdmin control panel

The DirectAdmin server control panel allows you to create backups to remote storage. To configure them, you will need access to a user with administrator rights.
Setting up a backup
Let’s look at setting up such a backup using the example of creating backups to your Cloud Storage:
Important: all highlighted variables in the examples must be replaced with your information.
1. Log in to your DirectAdmin control panel using an account with administrator rights.
2. On the left, in the Admin control panel, expand the Admin Tools section and then open the Admin Backup/Transfer tab:

3. In the open tab, click the +Schedule button to create a new backup task:

4. You will need to configure 4 forms with settings with laconic names Who, When, Where, What. In the first form Who we select which panel users this backup concerns:

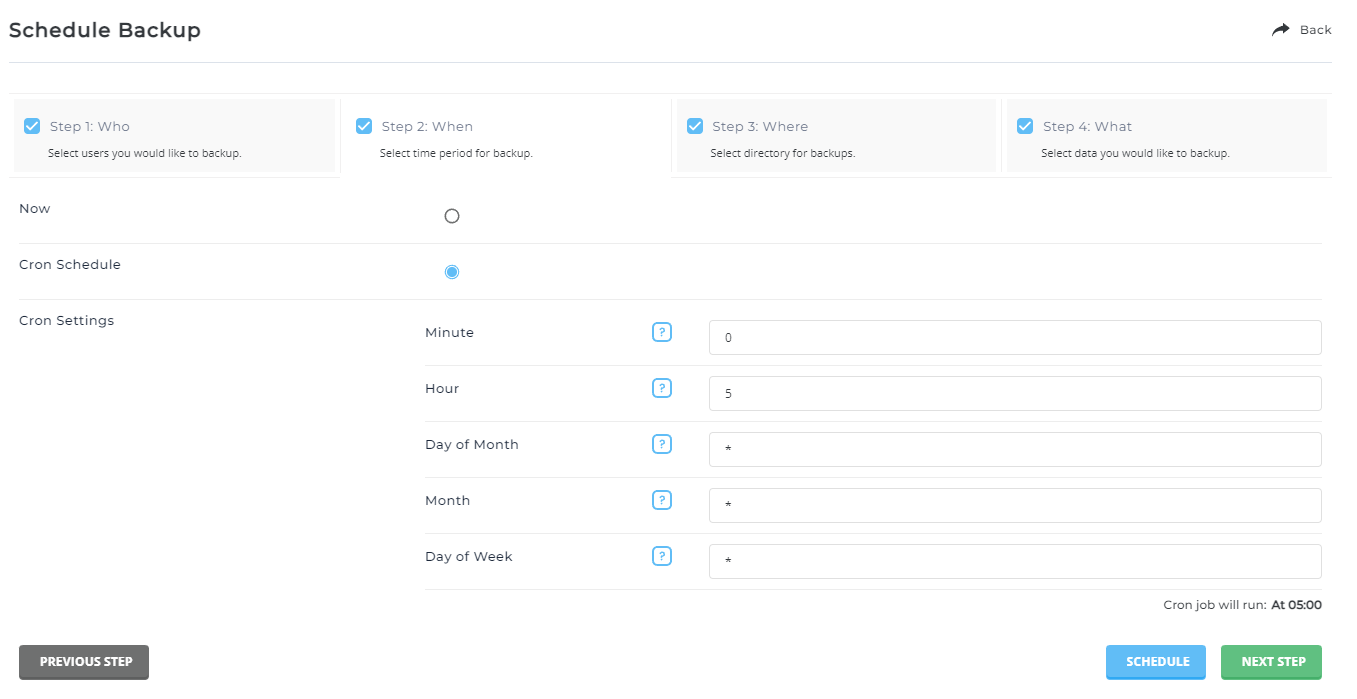
5. In the form When we set up the schedule for our backup. In our example, it will run at 5:00 every day:

6. In the next tab Where we fill in the access parameters to our remote server:

Where:
- IP – address of the remote host, for example server.keepdata.thehost.ua. The address of your Cloud Storage host can be found out as follows. Hostname will work similarly to the IP address.
- Username – active FTP user on the remote storage. In our example, ftp_user, created inside the KeepData panel.
- Password – password of such FTP user.
- Remote Path – path to the directory (based on the root directory for the FTP user), where the backup will be written. In our example, it is /backup/.
- Port – 21 for FTP, 22 for SFTP.
- Secure FTP – checkbox for using SFTP.
- Append – suffix to add to backup file name. In the example it is Full Data, this option will add full current date to file name.
7. In section What you need to select which files will be contained in backup:

8. After setting up all forms, click Schedule in the lower corner and you’re done! Now you have configured scheduled backup creation to your Cloud Storage or any other remote server you specified.


