4.1.13 Zen Cart installation on hosting or VPS

Zen Cart is an open-source CMS for online stores written in PHP. It supports a system of modules, templates, and payment/shipping plugins. Its flexible architecture, active community, and compatibility with modern PHP versions make Zen Cart a suitable solution for small and medium e-commerce projects, especially when extensibility and control over the code are important. It supports multilingual and multi-currency setups, flexible management of the catalog, coupons, and tax rules, as well as built-in SEO tools. Through the module catalog, you can easily connect payment gateways and delivery services, integrate with CRM/ERP, and customize themes without modifying the core.
Environment preparation
Requirements
- An active Hosting, Virtual server, or Dedicated server service
- CPU: 2–4 vCPU; RAM: from 4 GB; SSD: from 20 GB
- OS: Ubuntu 22.04 LTS or 24.04 LTS
- Web server: Nginx 1.20+ or Apache 2.4+ (a Unix environment is recommended)
- PHP: 8.2–8.3,
memory_limit≥512M - DBMS: MySQL 8.0+ or MariaDB 10.5+
- Access: root or a user with
sudoprivileges
Environment variables
DOMAIN_NAME— your domain nameZC_VERSION— Zen Cart version, for example1.5.9(check the Releases section on GitHub)DB_HOST,DB_NAME,DB_USER,DB_PASSWORD— database connection parametersWWW_USER,WWW_GROUP— web server user and group (usuallywww-data)ADMIN_EMAIL,ADMIN_PASS— administrator credentials
Installing Zen Cart on hosting
- Download the stable Zen Cart version from the official Zen Cart website.
- Upload the archive to hosting via the file manager or via FTP.
- Create a user and a database. Save
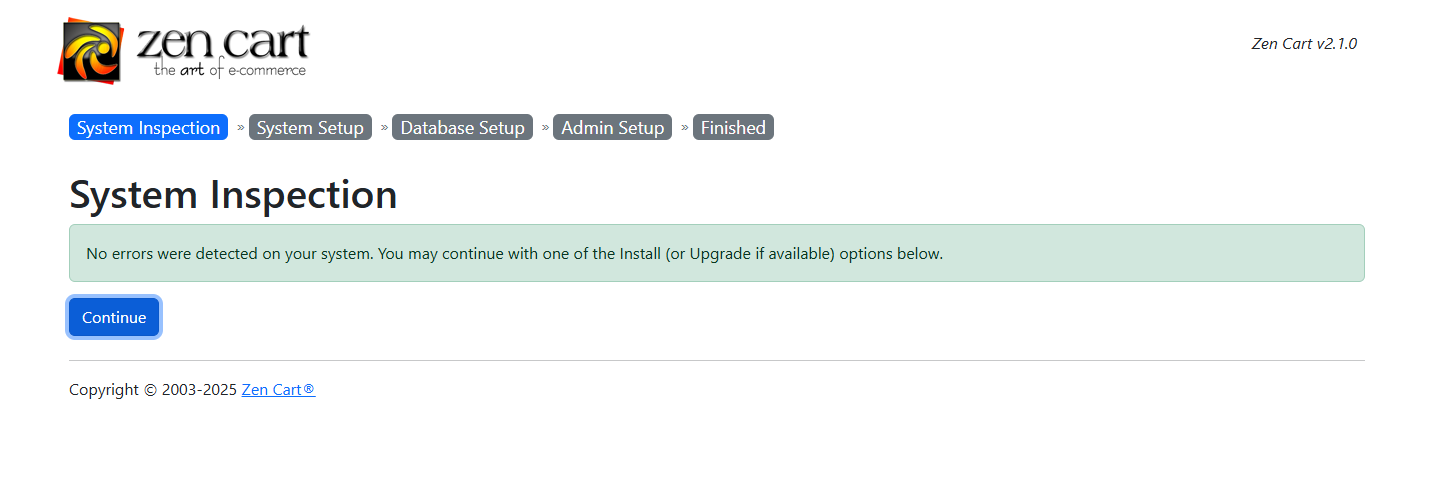
DB_HOST,DB_NAME,DB_USER,DB_PASSWORD. - Run the installer in the browser. Open
http://DOMAIN_NAME/zc_install/and follow the installation wizard:
- Specify the admin panel address and directory settings

- Fill in the previously created database parameters (
DB_HOST,DB_NAME,DB_USER,DB_PASSWORD);
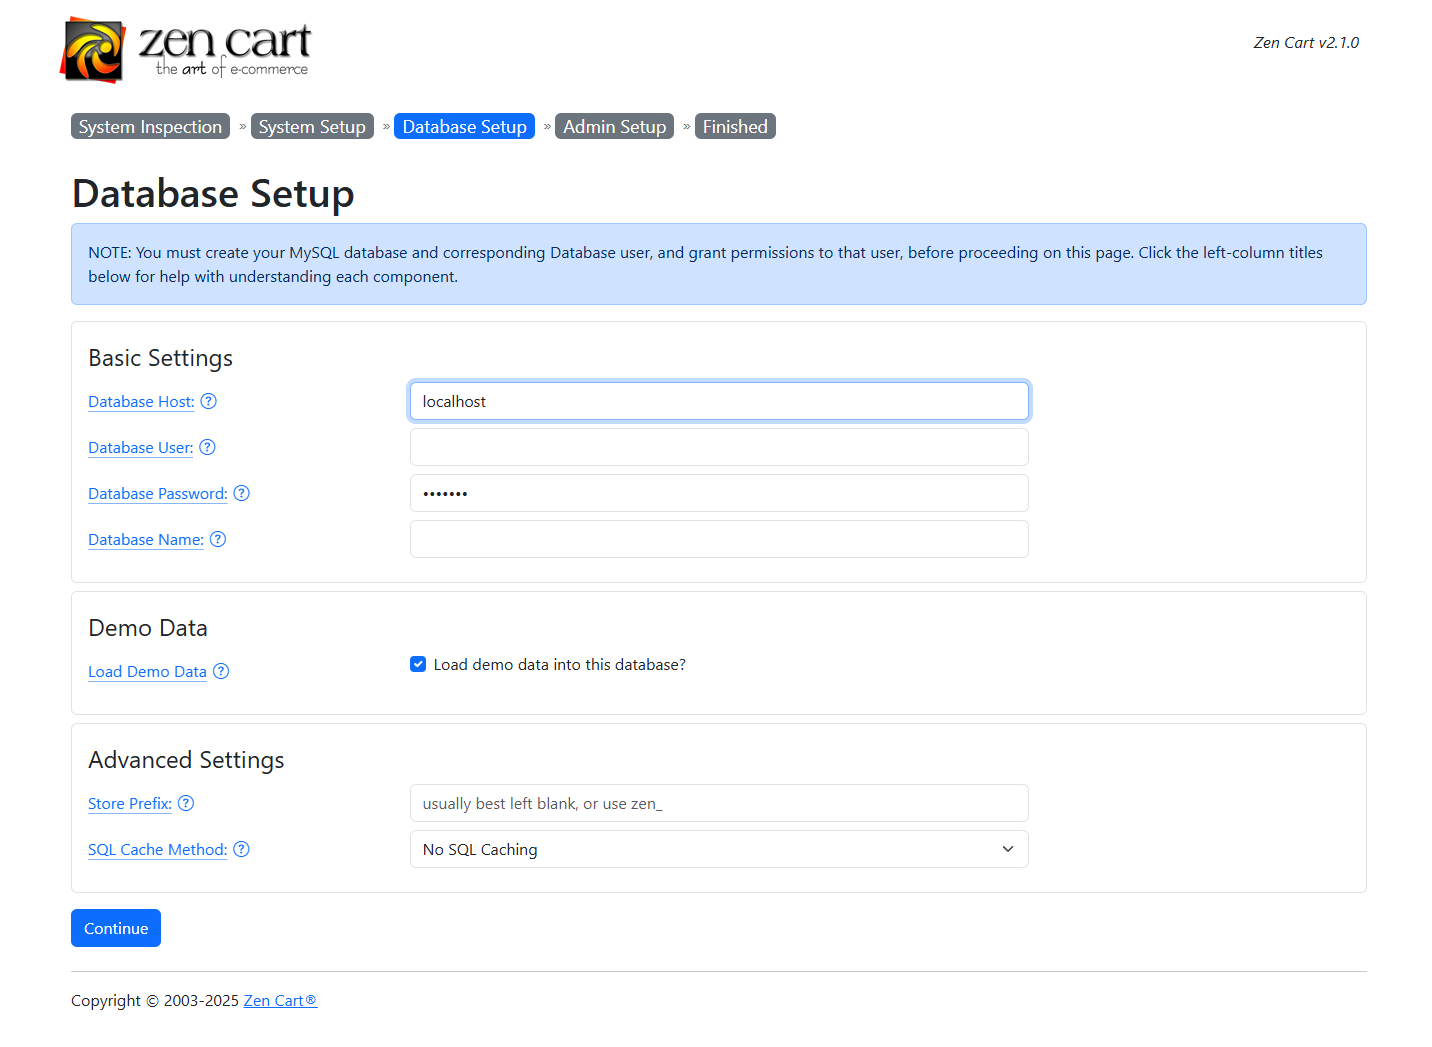
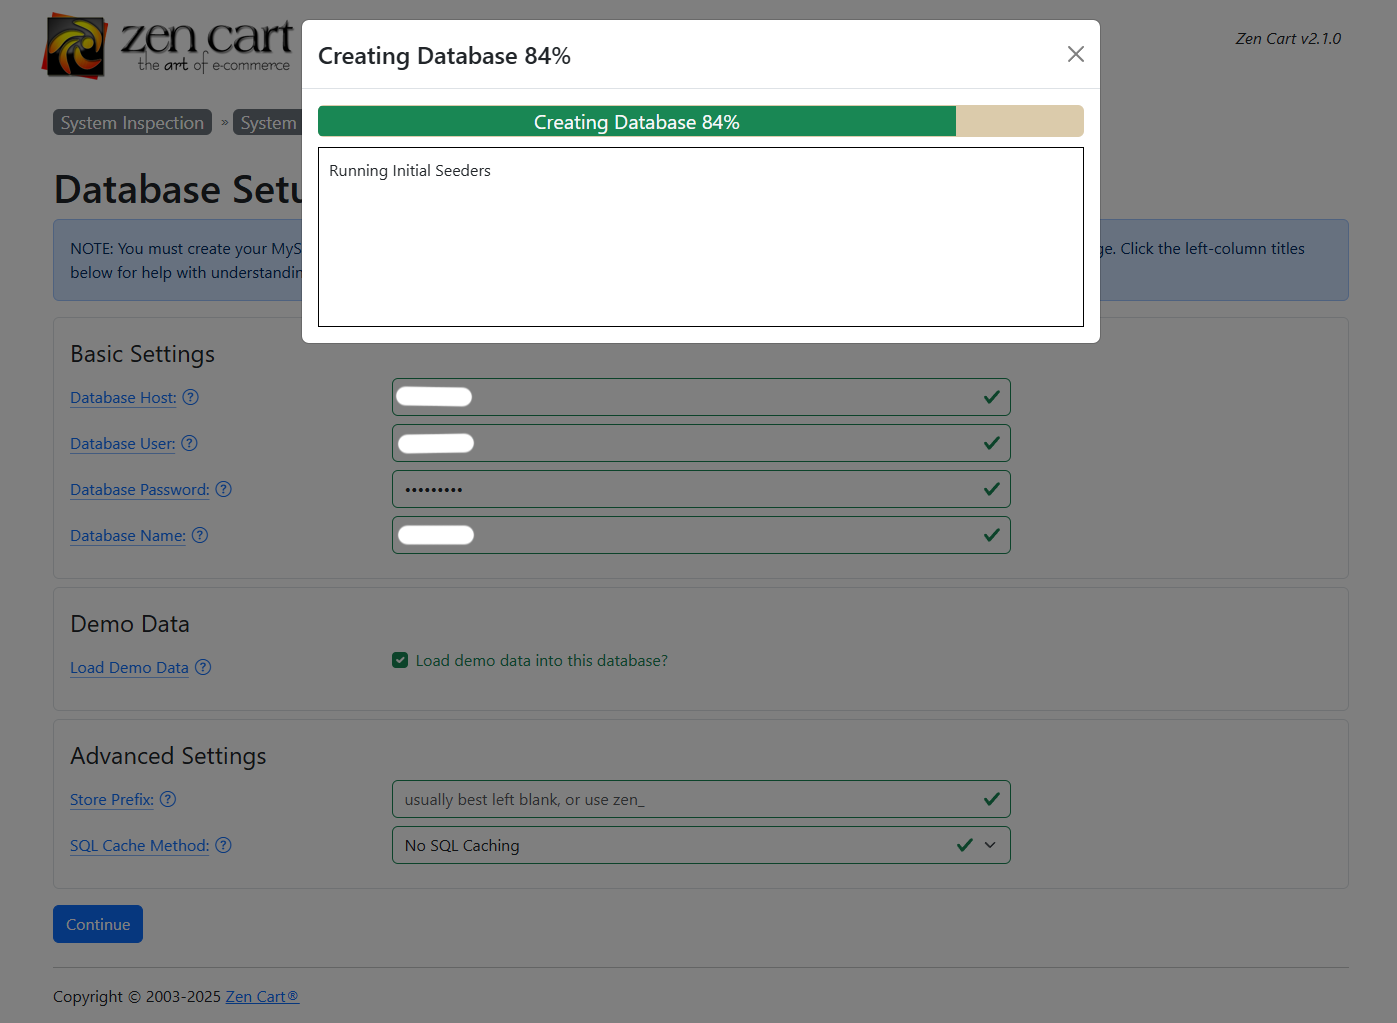
- Wait for the database setup to complete
- Fill in the administrator user data
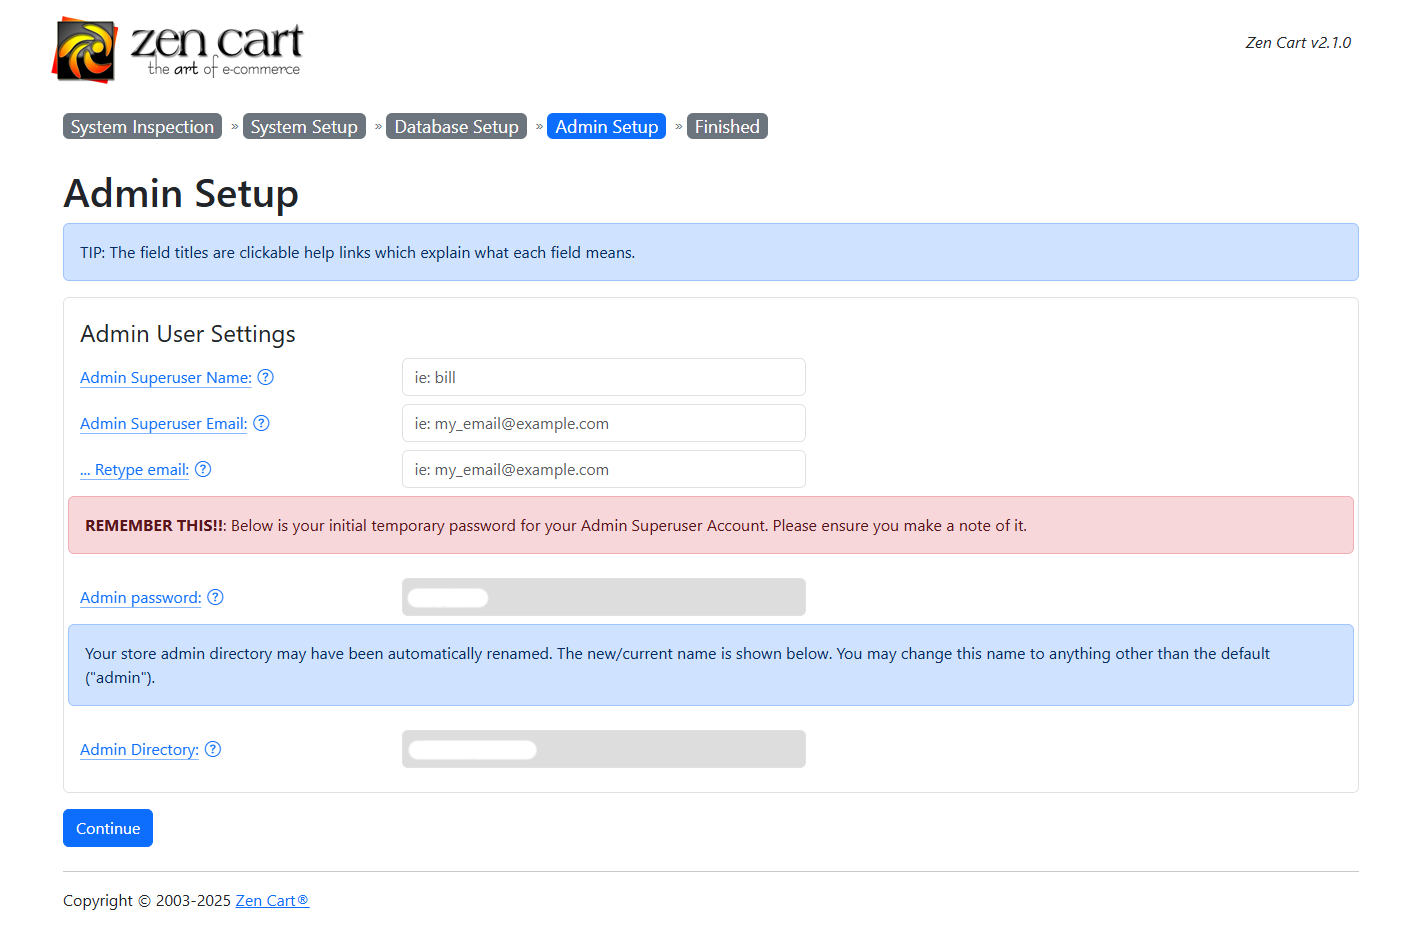
- Finish the installation and save the configuration file provided by the installer.
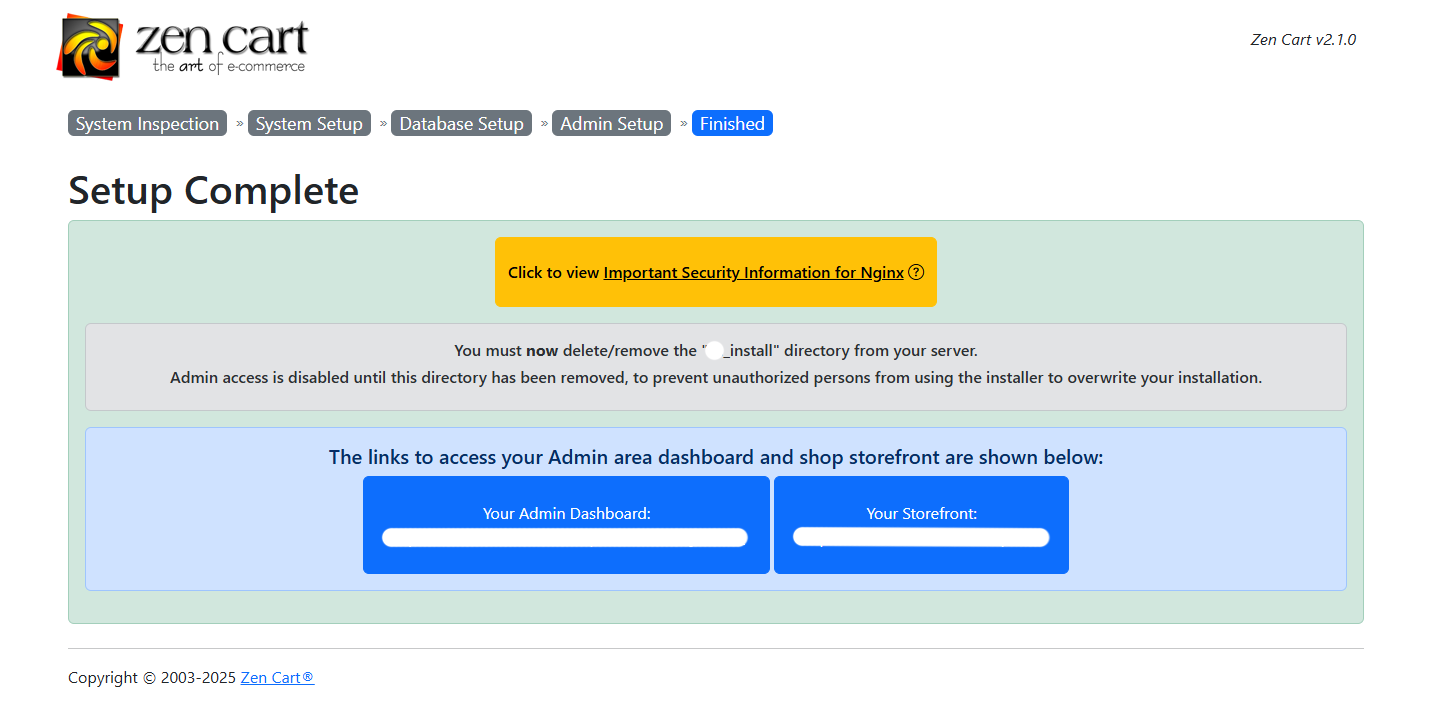
Tip. After installation, rename the admin panel directory to a unique name. The installer will offer to do this automatically.
Installing Zen Cart on a server
- Prepare the directory and download the release.
sudo mkdir -p /var/www/DOMAIN_NAME && cd /var/www/DOMAIN_NAME
export ZC_VERSION=1.5.9 # example; check the current version
wget -O zencart.zip "https://github.com/zencart/zencart/archive/refs/tags/v${ZC_VERSION}.zip"
unzip zencart.zip && rm zencart.zip
# Move files from the subdirectory if they are inside one
shopt -s dotglob nullglob; mv zencart-*/\* .; rmdir zencart-*/ || true
- Create the database and user.
mysql -u root <<SQL
CREATE DATABASE DB_NAME CHARACTER SET utf8mb4 COLLATE utf8mb4_unicode_ci;
CREATE USER 'DB_USER'@'localhost' IDENTIFIED BY 'DB_PASSWORD';
GRANT ALL PRIVILEGES ON DB_NAME.* TO 'DB_USER'@'localhost';
FLUSH PRIVILEGES;
SQL
- Install PHP and extensions.
sudo apt update
sudo apt install -y php8.2 php8.2-fpm php8.2-cli php8.2-mysql php8.2-xml \
  php8.2-gd php8.2-curl php8.2-zip php8.2-intl php8.2-mbstring
php -v
php -m | grep -E "mbstring|intl|zip|curl|xml|gd|mysql"
Configure PHP in the php.ini file: memory_limit=512M, max_execution_time=300.
Check service versions:
nginx -v
mysql --version
php -v
- Grant permissions to the web server.
sudo chown -R WWW_USER:WWW_GROUP /var/www/DOMAIN_NAME
find /var/www/DOMAIN_NAME -type d -exec chmod 755 {} \;
find /var/www/DOMAIN_NAME -type f -exec chmod 644 {} \;
- Run the web installer. Open
http://DOMAIN_NAME/zc_install/and complete the installation.
Nginx web server configuration
server {
    listen 80;
    server_name DOMAIN_NAME;

    root /var/www/DOMAIN_NAME/;
    index index.php index.html;

    location / {
        try_files $uri $uri/ /index.php?$query_string;
    }

    location ~ \.php$ {
        include fastcgi_params;
        fastcgi_param SCRIPT_FILENAME $realpath_root$fastcgi_script_name;
        fastcgi_pass unix:/run/php/php8.2-fpm.sock;
        fastcgi_read_timeout 120;
    }

    # Protection from direct access to service paths
    location ~* ^/(zc_install/|cache/|logs/|includes/extra_configures/|.git/) {
        deny all;
        return 403;
    }
}
Enable the site and reload Nginx:
sudo ln -s /etc/nginx/sites-available/zencart.conf /etc/nginx/sites-enabled/
sudo nginx -t && sudo systemctl reload nginx
Important: after successful installation, delete the zc_install/ directory and rename the admin directory to a unique name. Otherwise, the admin panel and installer can become an attack vector.
Configuring additional Zen Cart features
SSL certificate (HTTPS)
To work over HTTPS, use Let’s Encrypt or a commercial SSL certificate.
.htaccess for SEO-friendly URLs
On Apache, Zen Cart relies on .htaccess and the mod_rewrite module for SEO-friendly URLs. In Nginx, .htaccess is not used—the equivalent behavior is provided by the try_files rule shown in the Nginx section.
- Enable
mod_rewriteand allow.htaccessfor the site directory.
sudo a2enmod rewrite
sudo systemctl reload apache2
<VirtualHost *:80>
    ServerName DOMAIN_NAME
    DocumentRoot /var/www/DOMAIN_NAME/

    <Directory /var/www/DOMAIN_NAME/>
        AllowOverride All
        Options -Indexes -MultiViews
        Require all granted
    </Directory>
</VirtualHost>
- Create/update
.htaccessin the project root.
# SEO-friendly URLs for Zen Cart (Apache)
<IfModule mod_rewrite.c>
  RewriteEngine On
  # Set the subdirectory if the shop is installed under /shop/
  RewriteBase /
  # Pass through existing files and directories
  RewriteCond %{REQUEST_FILENAME} -f [OR]
  RewriteCond %{REQUEST_FILENAME} -d
  RewriteRule ^ - [L]
  # Route everything else to the front controller
  RewriteRule . index.php [L]
</IfModule>

# Basic hardening
Options -Indexes
<FilesMatch "\.(tpl|inc|bak|sql|sh)$">
  Require all denied
</FilesMatch>
Note. If the shop is installed in a subdirectory, change RewriteBase / to RewriteBase /shop/. If you hit content-negotiation issues, add Options -MultiViews (already present in the example Directory block).
- Apply the configuration.
sudo apachectl configtest
sudo systemctl reload apache2
Verification! Сategories and products should open without index.php?main_page=.... If you get 404s, ensure AllowOverride All is active for the shop directory and that .htaccess is being read (check logs with sudo tail -f /var/log/apache2/error.log).
Store email (SMTP)
Specify SMTP parameters in the Zen Cart admin panel to avoid problems with sending emails:
account default
host SMTP_HOST
port SMTP_PORT
auth on
user SMTP_USER
password SMTP_PASSWORD
tls on
Hint. You can find the parameters for connecting to email / sending email messages in our instruction.
Backup
- Make regular DB dumps:
0 2 * * * /usr/bin/mysqldump -u DB_USER -p'DB_PASSWORD' DB_NAME | gzip > /backup/zencart-$(date +\%F).sql.gz
- Store copies outside the application server.
Verification
- Open the storefront:
http://DOMAIN_NAME/— the main page must load without 404/500 errors. - Log in to the administrative panel:
http://DOMAIN_NAME/admin_your_suffix/. Make sure access is possible only via the new path. - Check the installed Zen Cart version:
grep -E "PROJECT_VERSION_(MAJOR|MINOR|PATCH)" includes/version.php
You will see the MAJOR/MINOR/PATCH numbers corresponding to the installed release.
Common issues
| Error / Symptom | Cause | Solution |
|---|---|---|
| “Deprecated”/“Warning” on the site | PHP/module version mismatch | Use PHP 8.2–8.3, disable display_errors in production |
403 on /admin_.../ |
Incorrect site file and directory permissions that prevent the www-data user processes from writing to the specified directory |
Check the owner and Nginx location rules |
| Empty images/styles | Incorrect root paths in the config | Fix the paths in includes/configure.php |
Useful links
Official documentation and resources

