4.1.6 OpenCart Installation

OpenCart is a popular open-source CMS for online stores, written in PHP. It combines ease of administration, template flexibility, and a rich set of built-in features — from catalogs and shopping carts to payment and shipping modules.
OpenCart supports multi-language capabilities, SEO optimization, and integration with popular payment gateways (LiqPay, PayPal, Stripe, etc.). The CMS is suitable for both small stores and corporate solutions with a large number of products.
Important! Regularly update OpenCart CMS and installed plugins. This is crucial for protection against vulnerabilities and compatibility with new PHP and MySQL versions. Always make a backup of your website and database before updating.
Environment Preparation
Requirements
- Active Hosting, Virtual, or Dedicated server service
- PHP ≥ 8.1 with
mysqli,curl,zip,mbstring,gd,xmlmodules - MySQL 5.6 + or MariaDB 10.3 +
- Domain name
- Root access or user with sudo privileges (if without a control panel)
Environment Variables
DOMAIN_NAME— store domainDB_NAME,DB_USER,DB_PASSWORD— DB credentialsUPLOAD_PATH— website files directoryADMIN_PATH— custom path to OpenCart admin panel
Installation Opencart on hosting
- Download the latest stable version of OpenCart from the official website.
- Upload the archive to the
~/www/DOMAIN_NAMEdirectory and unpack it. - Create a new database.
- Open your website’s address (
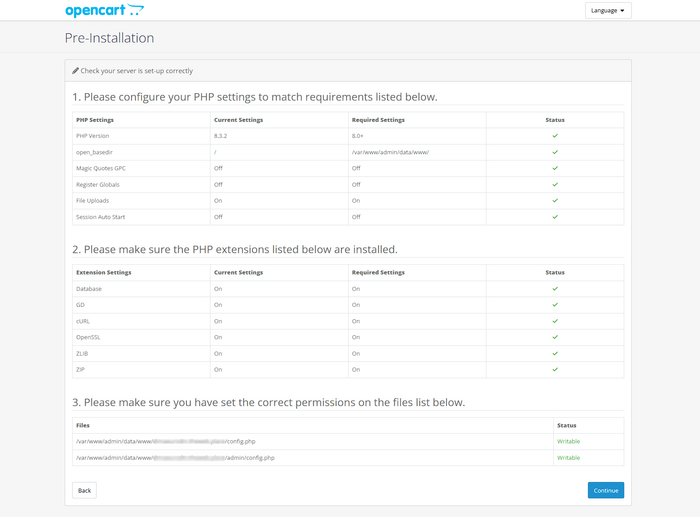
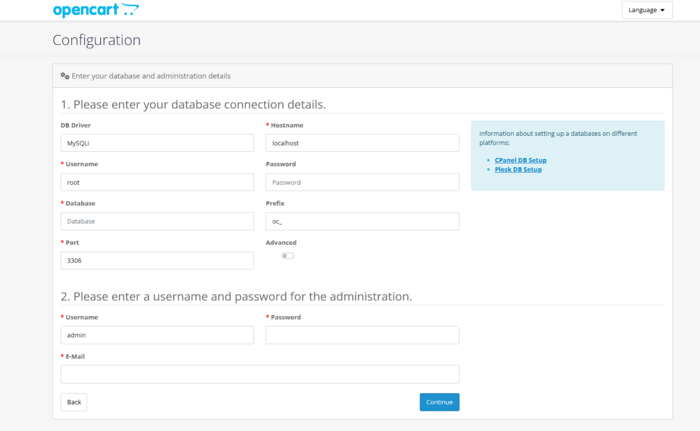
http://DOMAIN_NAMEorhttps://DOMAIN_NAME) in your browser to launch the OpenCart web installer. The installation wizard will appear in the opened window, where you need to sequentially specify the site parameters: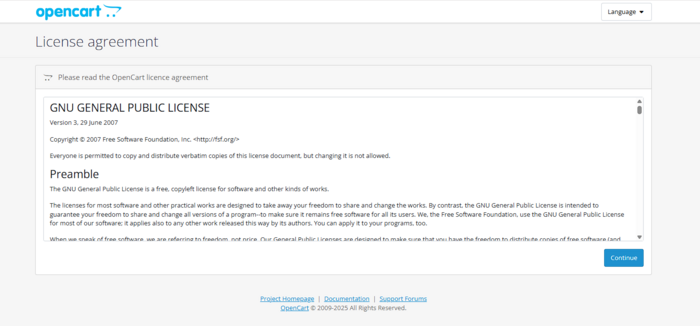
- OpenCart requirements check;
-
store name and administrator email;
-
login and password for the panel;
-
database parameters (
DB_NAME,DB_USER,DB_PASSWORD).
- After installation, delete the
/install/directory (the CMS will offer to do this automatically).
Installation Opencart on server
Important: If your server is managed via a control panel (ISPmanager, cPanel, etc.), Docker is not required. Use Docker installation only if you are configuring the server manually.
-
Install Nginx / Apache, PHP-FPM, and MySQL.
-
Create the
/var/www/DOMAIN_NAMEdirectory and upload the OpenCart archive there. -
Unpack it and grant permissions to the web user:
sudo chown -R www-data:www-data /var/www/DOMAIN_NAME sudo chmod -R 755 /var/www/DOMAIN_NAME -
Configure the virtual host in Nginx:
/etc/nginx/sites-available/opencart.confserver { listen 80; server_name DOMAIN_NAME; root /var/www/DOMAIN_NAME/upload; index index.php index.html; location / { try_files $uri $uri/ /index.php?$query_string; } location ~ \.php$ { include snippets/fastcgi-php.conf; fastcgi_pass unix:/run/php/php8.2-fpm.sock; } }Activate the site and restart Nginx:
sudo ln -s /etc/nginx/sites-available/opencart.conf /etc/nginx/sites-enabled/
sudo nginx -t && sudo systemctl reload nginx
Configuring Opencart Additional Features
Configuration Setup
The OpenCart site configuration file is located at:
- VPS:
/var/www/DOMAIN_NAME/upload/config.php - hosting panel:
~/www/DOMAIN_NAME/upload/config.php
The configuration file for the OpenCart admin panel is located at:
- VPS:
/var/www/DOMAIN_NAME/upload/admin/config.php - hosting panel:
~/www/DOMAIN_NAME/upload/admin/config.php
You can find more details in our guide
Connecting an SSL Certificate
To enable secure HTTPS protocol, use Let’s Encrypt or a commercial SSL certificate. After installation, enable Use SSL in the store settings within the OpenCart administration panel.
Performance Optimization
- Enable caching in System → Settings → Server → Use Cache.
- Activate GZIP compression (optimally 6–7).
- Ensure PHP OPcache is enabled.
- Configure cache directories with write permissions (
system/storage/cache/).
Verifying Operation
- Open
https://DOMAIN_NAME/adminin your browser — the admin panel should load. - Go to Reports → Statistics and confirm that the system is working.
- Visit
https://DOMAIN_NAME/— the store’s main page should open without errors. - Add a test product and check the shopping cart.
Common Errors
| Error / Symptom | Cause | Solution |
|---|---|---|
| White screen after installation | PHP error or incompatible module | Enable error display in php.ini (display_errors = On) and check the error log |
| Database connection error | Incorrect DB_USER / DB_PASSWORD credentials |
Correct the values in config.php and admin/config.php, verify MySQL user privileges |
| Cannot delete install folder | Insufficient write permissions or system file lock | Remove the folder manually via FTP, SSH, or your hosting control panel |
Useful Links
Official Documentation

