8.2.24 Install and cofigure Moodle

Moodle — an open PHP-based LMS (Learning Management System) built around modularity and a flexible permission model. Suitable for corporate training, universities, schools and commercial online courses — from small installations to clusters with thousands of concurrent learners.
Server preparation
Requirements
- Virtual or dedicated server with Ubuntu 24.04 LTS installed.
- root access or a sudo user.
- Active domain name
Variables
SERVER_IP_ADDRESS— server IP addressYOUR_DOMAIN— Moodle domain (for example,moodle.example.com)DB_NAME— Moodle database nameDB_USER— database userDB_PASSWORD— database user passwordMOODLE_DIR— Moodle installation path (for example,/var/www/moodle)MOODLEDATA_DIR— Moodle data directory (for example,/var/moodledata)
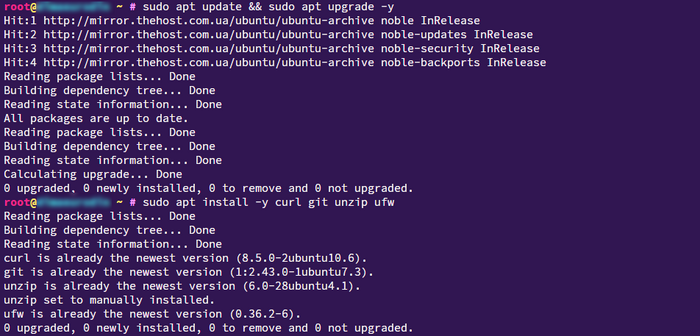
Update the system and install utilities
Update packages and install basic tools.
sudo apt update && sudo apt upgrade -y
sudo apt install -y curl git unzip rsync ufw
Enable the firewall
Allow SSH and HTTP/HTTPS
sudo ufw allow OpenSSH
sudo ufw allow 80,443/tcp
sudo ufw --force enable
sudo ufw status
sudo iptables -A INPUT -i lo -j ACCEPT
sudo iptables -A INPUT -m conntrack --ctstate ESTABLISHED,RELATED -j ACCEPT
sudo iptables -A INPUT -p tcp --dport 22 -j ACCEPT
sudo iptables -A INPUT -p tcp --dport 80 -j ACCEPT
sudo iptables -A INPUT -p tcp --dport 443 -j ACCEPT
Install LEMP (Nginx, MariaDB, PHP-FPM 8.3)
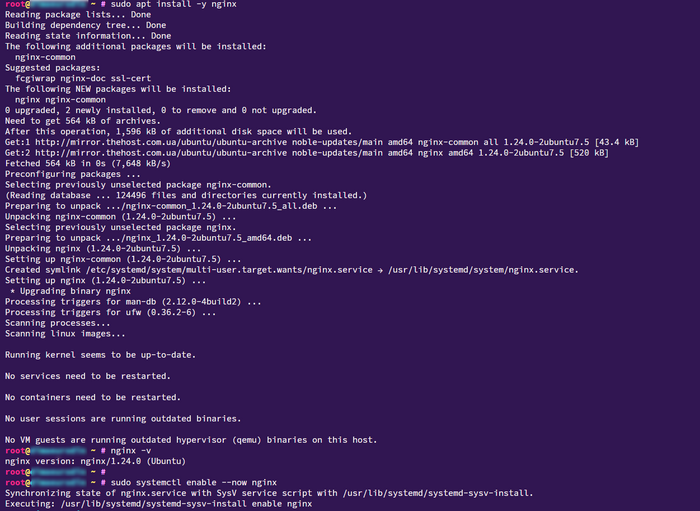
Install and start Nginx
Install the web server and enable autostart.
sudo apt install -y nginx
nginx -v
sudo systemctl enable --now nginx
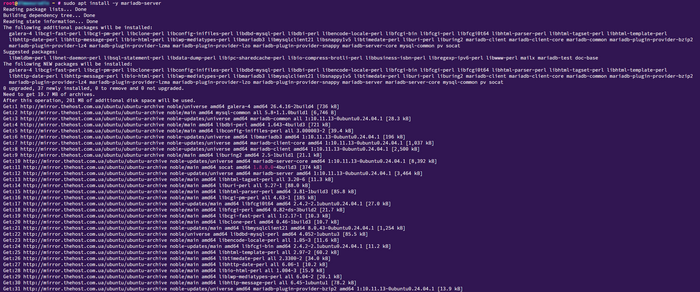
Install MariaDB 10.11
Install the database server and perform basic hardening.
sudo apt install -y mariadb-server
mariadb --version
sudo systemctl enable --now mariadb
sudo mysql_secure_installation
Alternative: You may use MySQL, but ensure the version is supported by the current Moodle documentation. For this guide we use MariaDB 10.11.
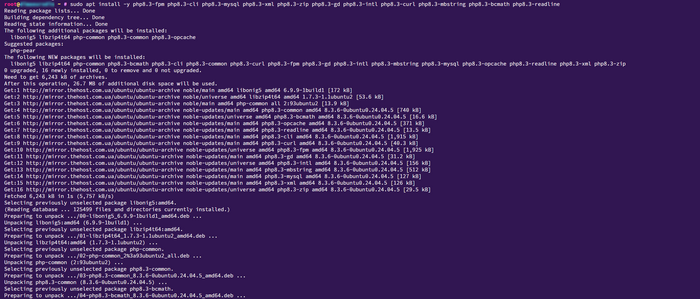
Install PHP-FPM 8.3 and required extensions
Install PHP-FPM and the modules required by Moodle.
sudo apt install -y php8.3-fpm php8.3-cli php8.3-mysql php8.3-xml php8.3-zip php8.3-gd php8.3-intl php8.3-curl php8.3-mbstring php8.3-bcmath php8.3-readline php8.3-redis
php -v
php -m | grep -E 'intl|xml|curl|zip|gd|mbstring|bcmath|sodium'
Database preparation
Create the database, user and privileges
Connect to MariaDB and create resources with utf8mb4 encoding.
sudo mariadb
CREATE DATABASE DB_NAME DEFAULT CHARACTER SET utf8mb4 COLLATE utf8mb4_unicode_ci;
CREATE USER 'DB_USER'@'localhost' IDENTIFIED BY 'DB_PASSWORD';
GRANT ALL PRIVILEGES ON DB_NAME.* TO 'DB_USER'@'localhost';
FLUSH PRIVILEGES;
EXIT;
Note: you must replace the shown variables — DB_NAME, DB_USER, DB_PASSWORD. Otherwise you will create a database with insecure names and password.
Downloading and placing Moodle
Create the required directories and set permissions
sudo mkdir -p /var/www/moodle /var/moodledata
sudo git clone -b MOODLE_500_STABLE https://github.com/moodle/moodle.git  /var/www/moodle
sudo chown -R www-data:www-data  /var/www/moodle /var/moodledata

Important: do not confuse the directories!
/var/www/moodle — code (this is where index.php resides),
/var/moodledata — data (there must not be public PHP files here).
Install from the Git repository
Create the directories, clone the stable branch and set permissions.
sudo mkdir -p /var/www/moodle /var/moodledata
sudo chown -R www-data:www-data /var/moodledata
sudo chmod 770 /var/moodledata

sudo git clone -b MOODLE_500_STABLE https://github.com/moodle/moodle.git /var/www/moodle
sudo chown -R www-data:www-data /var/www/moodle
Nginx configuration
Create a virtual host for Moodle
Create the site config with the correct root, routing and PHP-FPM settings.
[line_numbers,nginx]
server {
    listen 80;
    server_name SERVER_IP;   # add the IP or your domain name
    root /var/www/moodle;
    index index.php;

    location / {
        try_files $uri $uri/ /index.php?$query_string;
    }

    location ~ \.php(/|$) {
        fastcgi_split_path_info ^(.+\.php)(/.*)$;
        set $path_info $fastcgi_path_info;

        try_files $fastcgi_script_name =404;

        include fastcgi_params;
        fastcgi_param SCRIPT_FILENAME $document_root$fastcgi_script_name;
        fastcgi_param PATH_INFO $path_info;

        fastcgi_pass unix:/run/php/php8.3-fpm.sock;
        fastcgi_index index.php;
        fastcgi_read_timeout 300s;
        fastcgi_buffers 16 16k;
        fastcgi_buffer_size 32k;
    }

    location ~* \.(?:css|js|jpg|jpeg|gif|png|svg|ico|webp|woff2?)$ {
        try_files $uri =404;
        access_log off;
        expires 7d;
    }

    location ~ /. { deny all; }
}
Enable the site and disable the default
Activate the config and reload Nginx.
sudo ln -sf /etc/nginx/sites-available/moodle.conf /etc/nginx/sites-enabled/moodle.conf
sudo rm -f /etc/nginx/sites-enabled/default
sudo nginx -t && sudo systemctl reload nginx
PHP tuning
Adjust PHP limits for Moodle
Open php.ini and increase the key parameters.
memory_limit = 512M
upload_max_filesize = 100M
post_max_size = 100M
max_execution_time = 300
max_input_vars = 5000
cgi.fix_pathinfo = 0
Apply PHP-FPM changes
Restart PHP-FPM and check status.
sudo systemctl restart php8.3-fpm
systemctl status php8.3-fpm --no-pager
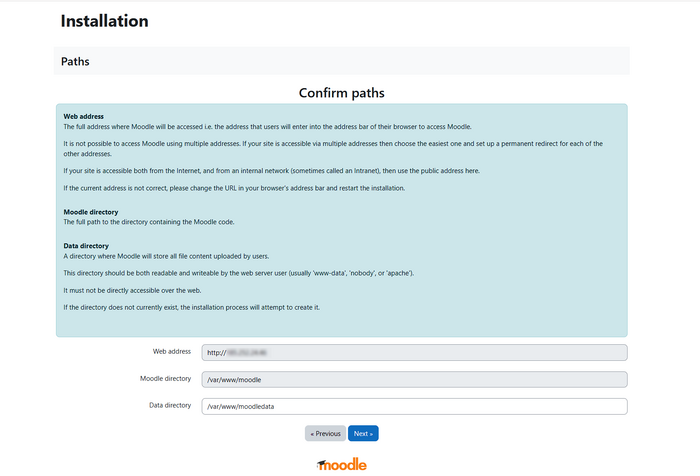
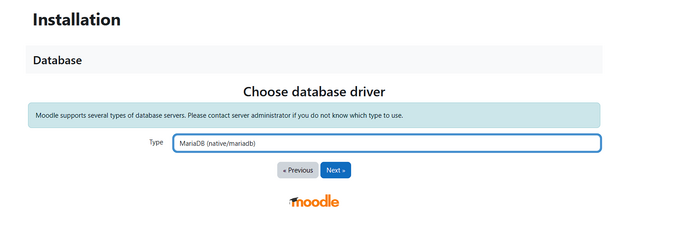
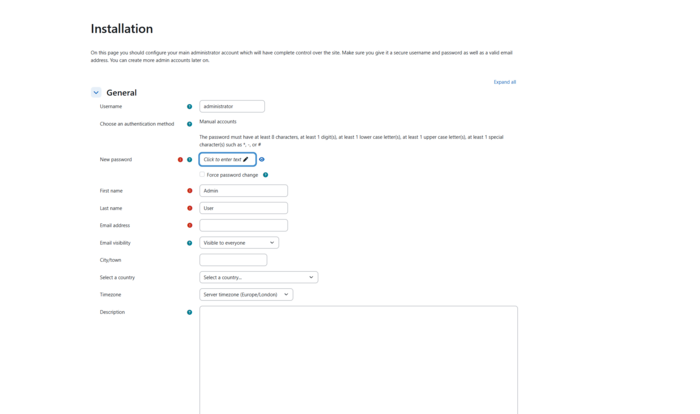
Web installation of Moodle
Run the installation wizard
Open http://YOUR_DOMAIN/ or http://SERVER_IP/ and follow the wizard:
- Select language, confirm
MOODLE_DIRandMOODLEDATA_DIRpaths.
- Choose the MariaDB (mysqli) driver and enter
DB_NAME,DB_USER,DB_PASSWORD.
- Wait for environment checks and table installation.
- Create the administrator account.
- Fill in the final information to start using Moodle:
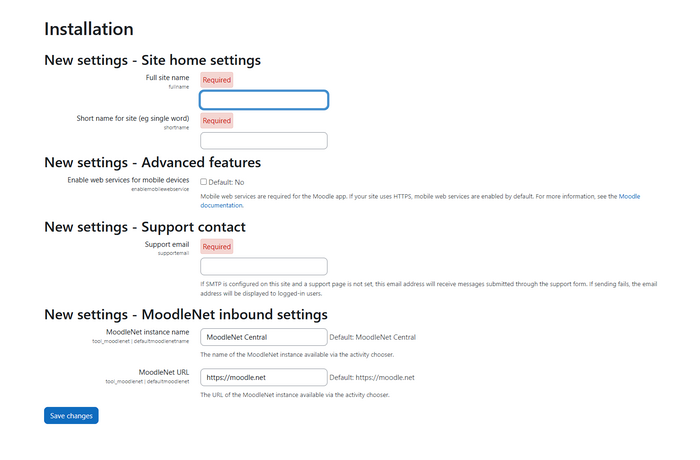
After completing these steps you will reach the administration panel:
Additional
Optimize OPcache
Add basic opcode cache settings.
opcache.enable=1
opcache.memory_consumption=192
opcache.interned_strings_buffer=16
opcache.max_accelerated_files=8000
opcache.validate_timestamps=1
opcache.revalidate_freq=60
sudo systemctl restart php8.3-fpm
Checks and post-installation steps
Verify component versions
Ensure the versions meet expectations.
php -v && nginx -v && mariadb --version
Test cron
Verify that background tasks run.
sudo -u www-data php /var/www/moodle/admin/cli/cron.php
Configure backups
Schedule backups for the database and moodledata.
sudo mkdir -p /opt/backups
echo '0 3 * * * root mysqldump DB_NAME | gzip > /opt/backups/moodle-$(date +\%F).sql.gz' | sudo tee /etc/cron.d/moodle-db-backup
echo '30 3 * * * root tar -czf /opt/backups/moodledata-$(date +\%F).tgz /var/moodledata' | sudo tee -a /etc/cron.d/moodle-db-backup
Common issues
| Error / Symptom | Cause | Fix | Diagnostics (logs / commands) |
|---|---|---|---|
Environment check complains about sodium |
Extension not loaded or a different PHP is used | Ensure PHP 8.3 from Ubuntu is running (sodium is built-in there), restart FPM | php -m, php -v, systemctl status php8.3-fpm |
“Insufficient max_input_vars” |
Value < 5000 | Increase to ≥ 5000 in php.ini, restart FPM |
grep max_input_vars /etc/php/8.3/fpm/php.ini |
| Page without CSS / broken links | Incorrect handling of slash arguments in Nginx | Use the recommended FastCGI block from MoodleDocs | Check site config and sudo nginx -t |
| 403/404 when uploading files | Incorrect MOODLEDATA_DIR permissions |
Owner/permissions must be www-data, chmod 770 |
sudo -u www-data touch MOODLEDATA_DIR/.test |
| Database connection error | Incorrect credentials / host | Verify user/password and privileges | mysql -u DB_USER -p -h localhost DB_NAME |
Useful links
Official documentation

