4.1.7 osCommerce Installation Guide

osCommerce is a classic open-source Content Management System (CMS) for online stores, written in PHP. The platform is designed to build full-featured e-commerce websites with product catalogs, shopping carts, payment, and delivery modules. Thanks to its modular architecture, osCommerce is easily extendable and suitable for stores of any scale—from small boutiques to large retail networks.
The system uses MySQL or MariaDB, is compatible with Apache and Nginx, runs on Linux servers, and is supported by an active developer community.
osCommerce is valued for its stability, simplicity, and the vast number of free plugins and templates.
- supports dozens of payment modules (PayPal, Stripe, LiqPay, etc.);
- includes built-in discount, tax, and coupon systems;
- allows product import and export (CSV, XML);
- easily integrates with ERP systems;
- fully optimized for SEO and SSL.
In essence, osCommerce is a reliable open-source e-commerce builder that provides maximum control to the store owner without unnecessary complexity.
Important! Regularly update osCommerce and all installed modules. This is critical to protect against vulnerabilities and maintain compatibility with new PHP and MySQL versions. Always create database and file backups before upgrading.
Server Preparation
Requirements
Environment Variables
DOMAIN_NAME— your store’s domainDB_NAME,DB_USER,DB_PASSWORD— database credentialsUPLOAD_PATH— path to the site directory
Installing osCommerce on hosting
osCommerce is installed via a web interface and does not require complex setup. You simply need to upload the system files and run the installer.
- Download the latest stable version from the official osCommerce website.
- Upload the archive to your domain folder (
~/www/DOMAIN_NAME) via FTP or File Manager in your hosting panel. - Unpack the archive and ensure the files are accessible to the web server.
- Create a new database (
DB_NAME) and user (DB_USER). - In your browser, open
https://DOMAIN_NAME/install— the installation wizard will appear.
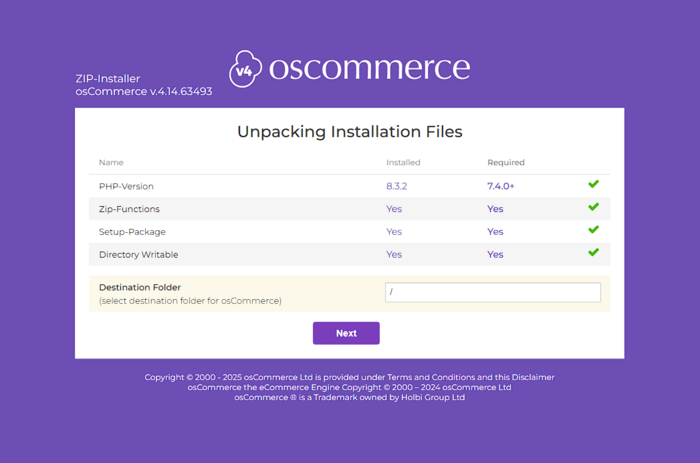
Follow the installation steps:
- specify the site name and administrator email;
- enter database parameters (
DB_NAME,DB_USER,DB_PASSWORD); - set a login and password for the admin panel.
After completing installation, delete the /install/ directory to secure the setup.
Installation osCommerce on Server
Important! If you use a control panel (ISPmanager, cPanel, aaPanel, etc.), perform all actions through it. Docker is not required.
If you are deploying osCommerce on a VPS, manually configure the LAMP or LEMP stack: Nginx / Apache + PHP + MySQL.
Example commands for Ubuntu 24.04:
sudo apt update && sudo apt install nginx php php-mysql php-zip php-mbstring php-xml mysql-server unzip -y
Copy osCommerce files to /var/www/DOMAIN_NAME:
sudo mkdir -p /var/www/DOMAIN_NAME
sudo unzip oscommerce.zip -d /var/www/DOMAIN_NAME
sudo chown -R www-data:www-data /var/www/DOMAIN_NAME
Configure Nginx:
server {
    listen 80;
    server_name DOMAIN_NAME;

    root /var/www/DOMAIN_NAME;
    index index.php index.html;

    location / {
        try_files $uri $uri/ /index.php?$query_string;
    }

    location ~ \.php$ {
        include snippets/fastcgi-php.conf;
        fastcgi_pass unix:/run/php/php8.2-fpm.sock;
    }

    location ~ /\.ht {
        deny all;
    }
}
Enable the site and restart Nginx:
sudo ln -s /etc/nginx/sites-available/oscommerce.conf /etc/nginx/sites-enabled/
sudo nginx -t && sudo systemctl reload nginx
Configuring osCommerce Additional Features
Enabling SSL Certificate
To enable HTTPS, use Let’s Encrypt or a commercial SSL certificate.
After installation, make sure the HTTPS redirect is active in your Nginx configuration.
Performance Optimization
- Enable page caching in osCommerce settings.
- Configure OPcache in PHP (
php.ini→opcache.enable=1). - Optionally, use Redis for session caching.
Backups
Create database and file backups daily: you can use the built-in Backup Manager in the admin panel or a cron script:
mysqldump -u DB_USER -p DB_PASSWORD DB_NAME > /backups/oscommerce_$(date +%F).sql
Verifying Installation
After installation, open:
https://DOMAIN_NAME/admin— osCommerce admin panel;https://DOMAIN_NAME/— storefront homepage.
Common Errors
| Error / Symptom | Cause | Solution |
|---|---|---|
| Database connection error | Incorrect DB_HOST, DB_USER, DB_PASSWORD, or insufficient permissions |
Correct the database credentials in the configure.php configuration file |
| White screen during install | Insufficient memory or missing PHP module | Increase memory_limit in php.ini and enable display_errors during installation |
| Install folder not deleted | Insufficient permissions | Delete manually via FTP |
| HTTPS not available | Missing SSL certificate | Install an SSL certificate in your hosting panel or on your server |
Useful links
Official Documentation

