4.1.5 Installing Joomla
Joomla is a free content management system (CMS, Content Management System) with open-source code, created for building websites of any level of complexity — from personal blogs to corporate portals and online stores.
It is written in PHP, uses MySQL or MariaDB databases, and works on any web server that supports PHP (Apache, Nginx, LiteSpeed, etc.).
Joomla is valued for its balance between simplicity and flexibility:
- has a built-in visual editor and template system;
- supports modules, plugins, and components (similar to extensions);
- allows user, role, and multilingual management “out of the box”;
- optimized for SEO and caching;
- has a large international community and thousands of free add-ons.
In essence, Joomla is a website builder with an architecture close to a framework: developers can create their own extensions and themes, while administrators can manage content without programming.
Information: Regularly update the Joomla CMS and installed plugins. This is important for protection against vulnerabilities and compatibility with new versions of PHP and MySQL. Always make a backup of your site and database before updating.
Environment preparation
Requirements
- Ordered service Hosting, Virtual, or Dedicated server
- PHP ≥ 8.1 with extensions
mysqli,json,mbstring,xml,zip - MySQL 5.6+ or MariaDB 10.3+
- Domain name (can be connected later)
Environment variables
DOMAIN_NAME— your domainDB_NAME,DB_USER,DB_PASSWORD— database parametersUPLOAD_PATH— path for Joomla files
Installation Joomla on hosting
-
Download the latest stable Joomla version from the official website.
-
Upload the archive to your domain directory
~/www/DOMAIN_NAMEusing the file manager or by connecting via FTP protocol, and extract the archive. -
Create a new database.
-
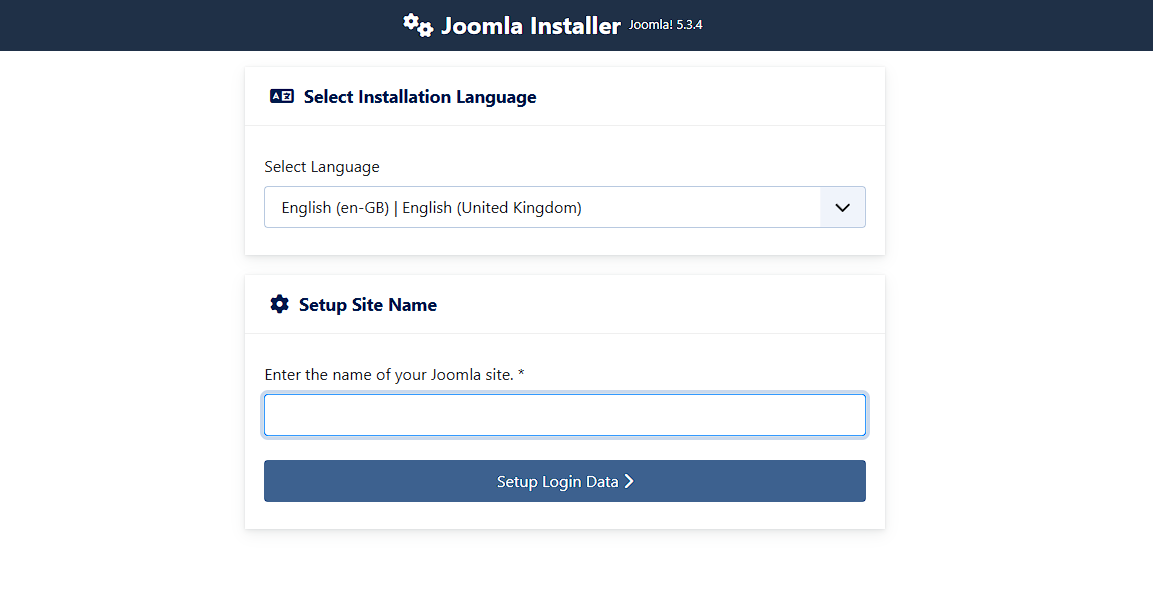
Open your site address in a browser (
http://DOMAIN_NAMEorhttps://DOMAIN_NAME) to start the Joomla web installer. In the window that opens, the installation wizard will appear, where you need to sequentially specify the site parameters:- enter the site name;
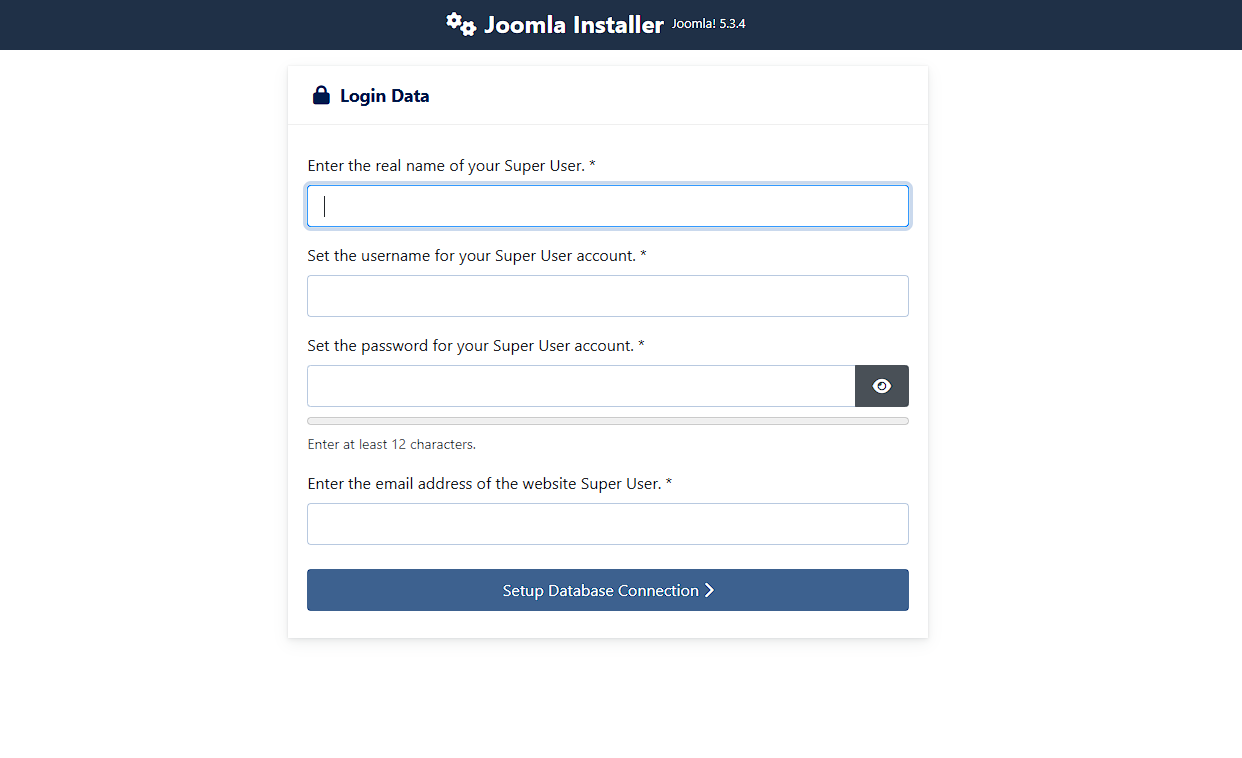
- administrator login;
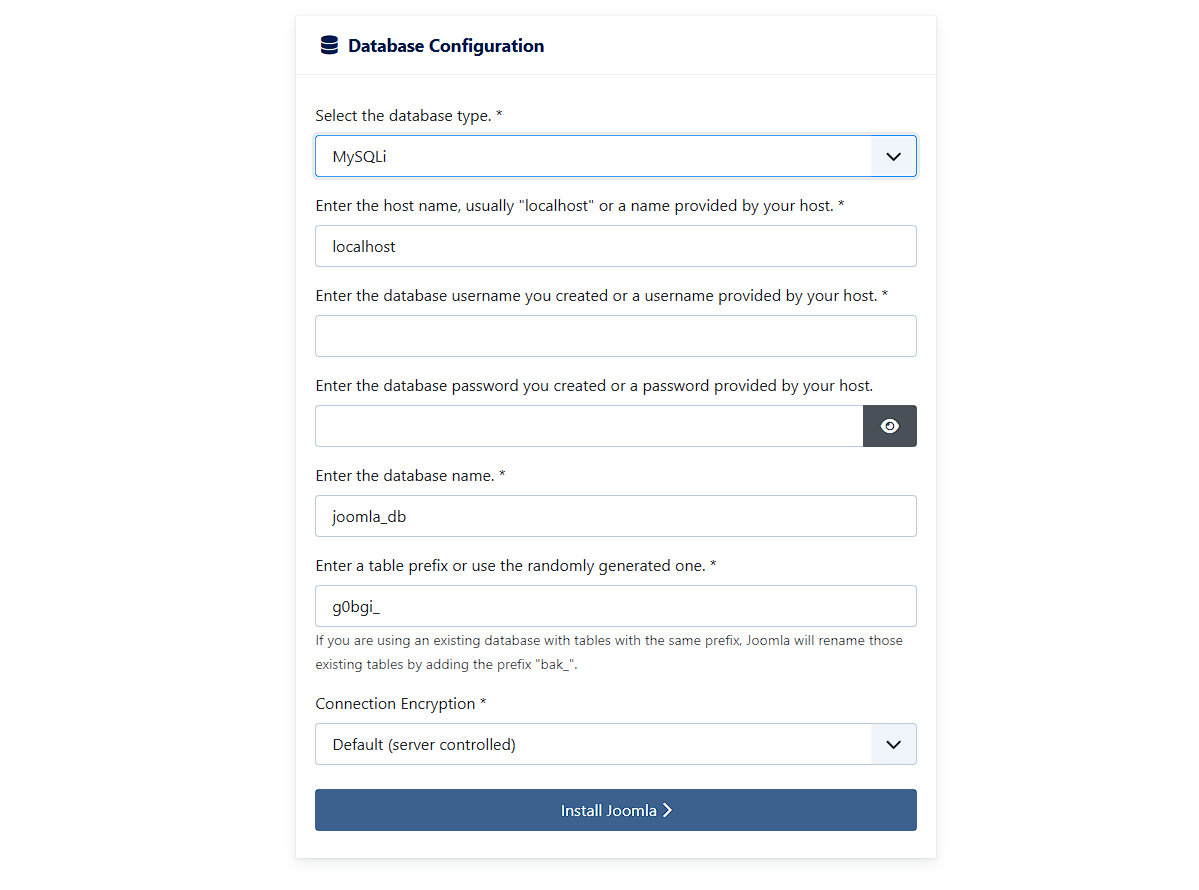
- database data (
DB_NAME,DB_USER,DB_PASSWORD).
- After completion, delete the
installation/directory (the system will suggest this automatically).
Installation Joomla on server
Attention: Docker is used only in the absence of third-party admin panels. If your server is managed through a hosting panel (for example, ISPmanager or cPanel), perform all steps directly in it; in this case Docker is not required.
If you are using a VPS or dedicated server, prepare the stack Nginx / Apache + PHP + MySQL or deploy Joomla using Docker.
Then upload Joomla to the site root and go through the web installation in the same way as with FTP.
Note: when installing on a dedicated server or VPS, make sure that ports 80 and 443 are open, and that the permissions for the directories /tmp, /logs, and /images allow writing for the web user.
Additional Joomla features setup
Site Configuration Files
The Joomla configuration file is located at:
~/www/DOMAIN_NAME/configuration.php
You can find more details in our guide
.
Connecting an SSL certificate
To work via the secure HTTPS protocol, use Let’s Encrypt or a commercial SSL certificate.
Performance optimization
- Enable Joomla caching in the admin panel: System → Global Configuration → System → Caching.
- Configure PHP OPcache (if available in the hosting panel).
Functionality check
- Open
https://DOMAIN_NAME/administratorand log in to the Joomla panel. - Go to System → Information — make sure all PHP extensions are marked in green.
- Go to
https://DOMAIN_NAME/— the main page of your Joomla site will open. Make sure it is displayed correctly and available without errors. - Create a test page or publication. If it opens on the site — the installation is successful.
Common errors
| Error / Symptom | Cause | Solution | Diagnostics |
|---|---|---|---|
| Database connection error | Incorrect DB_USER or DB_PASSWORD |
Check the settings in configuration.php |
Open the file and make sure the login and DB name are correct |
| White screen after installation | PHP error or missing module | Enable debugging in configuration.php ($debug = true;) |
Check web server or control panel logs |
| Cannot delete installation directory | Insufficient file permissions | Delete via FTP or panel file manager | Check 755 permissions for directories |
Useful links
Official documentation

